
-

-
Subscribe
Thanks for stopping by The Colorful Bee! Stay in touch and never miss a post. Subscribe to receive an e-mail when a new post is up, HERE.Sponsor
If you're interesting in advertising on The Colorful Bee, click here to learn more.Contact
You can also email me at Linda.Leyble@gmail.com -


Categories
Subscribe
Popular posts
-
Recent Posts
Blogroll
Links

Tag Archives: decorative painted ceiling
The Fifth Wall: The Importance of Decorating Your Ceiling
While I am awaiting the news of my new granddaughter’s birth (it should happen within a few hours…I can’t wait!!), I thought I’d share a project that I did in my home recently…my dining room moldings and some metallic plaster and decorative pattern on the ceiling. Here are some before shots…
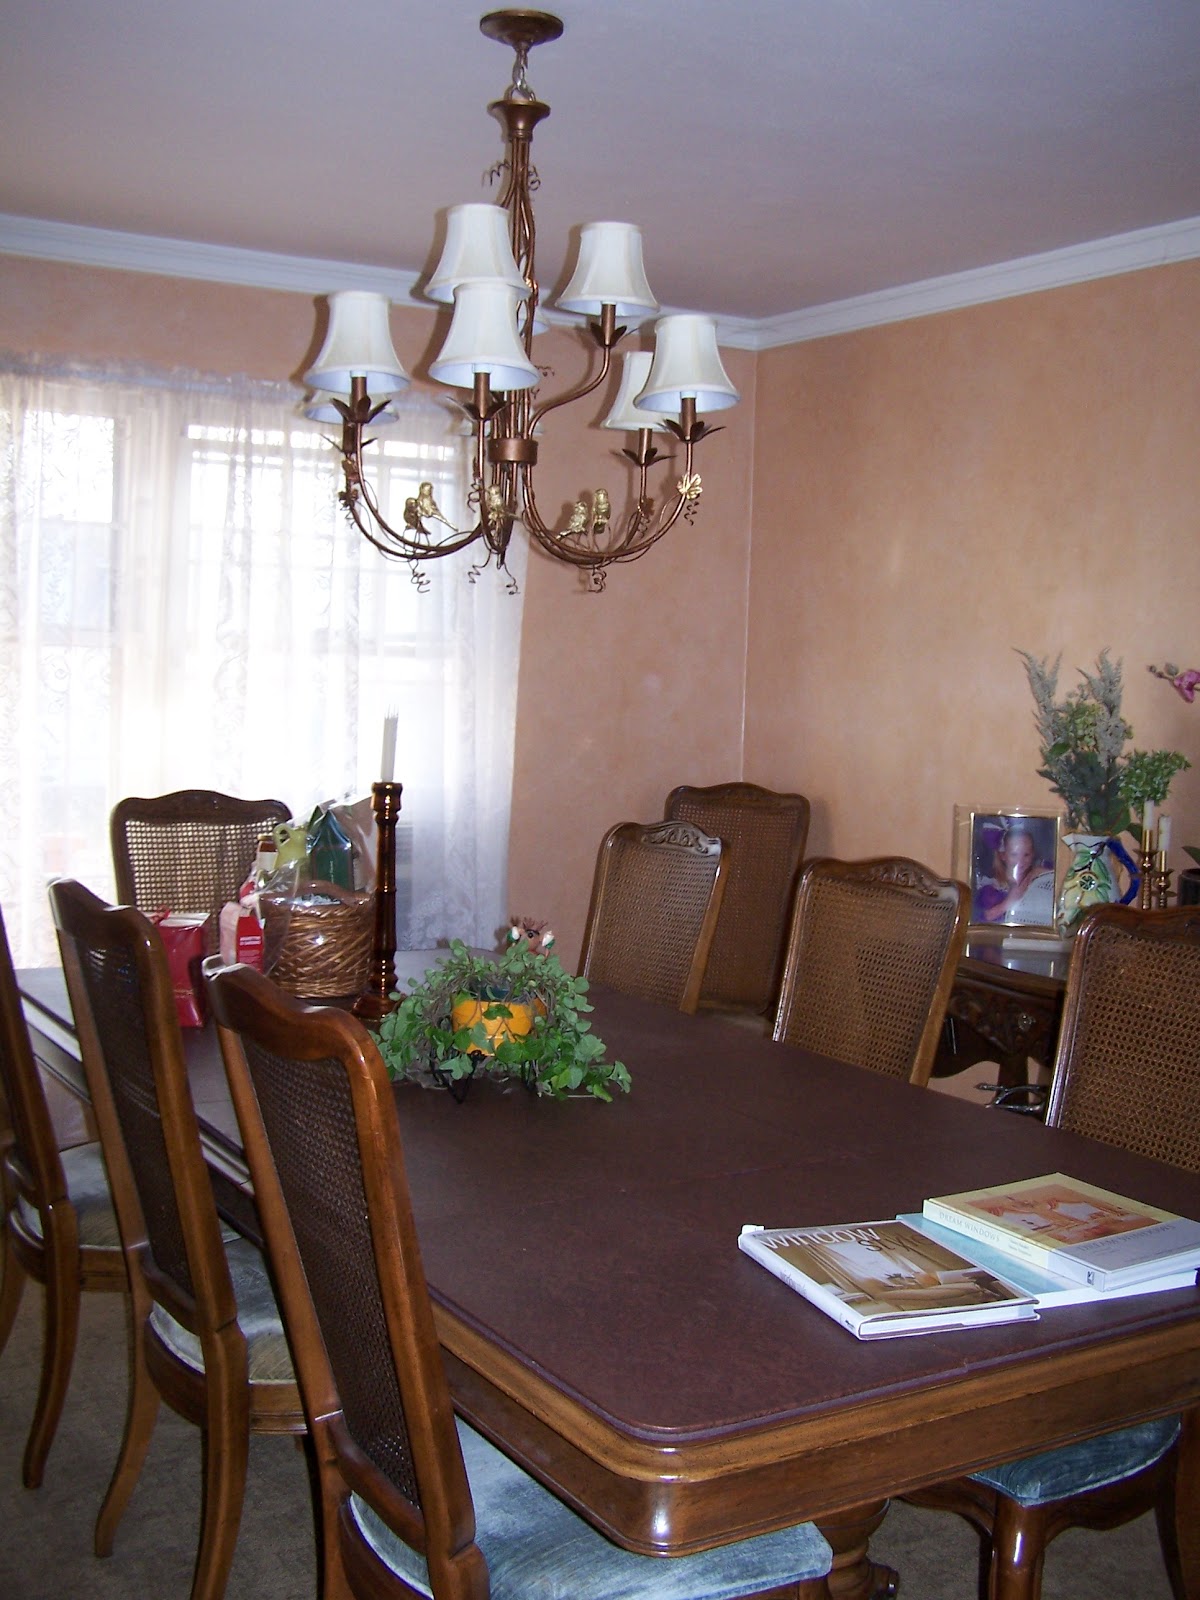


Above, you can see that adding new window treatments, artwork and carpeting helped a lot. It was very nice…but it wasn’t “me.” You know that feeling you may get about a room in your house that you’ve decorated – but you hardly ever sit in it? Well, that’s because it doesn’t speak to you and I believe every room should speak to its owner! I had done a lovely faux finish a few years back and I loved it…but it wasn’t enough. The lace curtains were not me – so I changed them. The ceiling and the moldings were just “so-so.” Adding a small crown molding and decorative base – and antiquing them helped a lot.
I love my dining set (love it but it needs to be updated with some new upholstery and some paint and antiquing still! Another post perhaps!) But…something was still missing. It needed more cohesiveness and extra intimacy (every dining room needs this!).

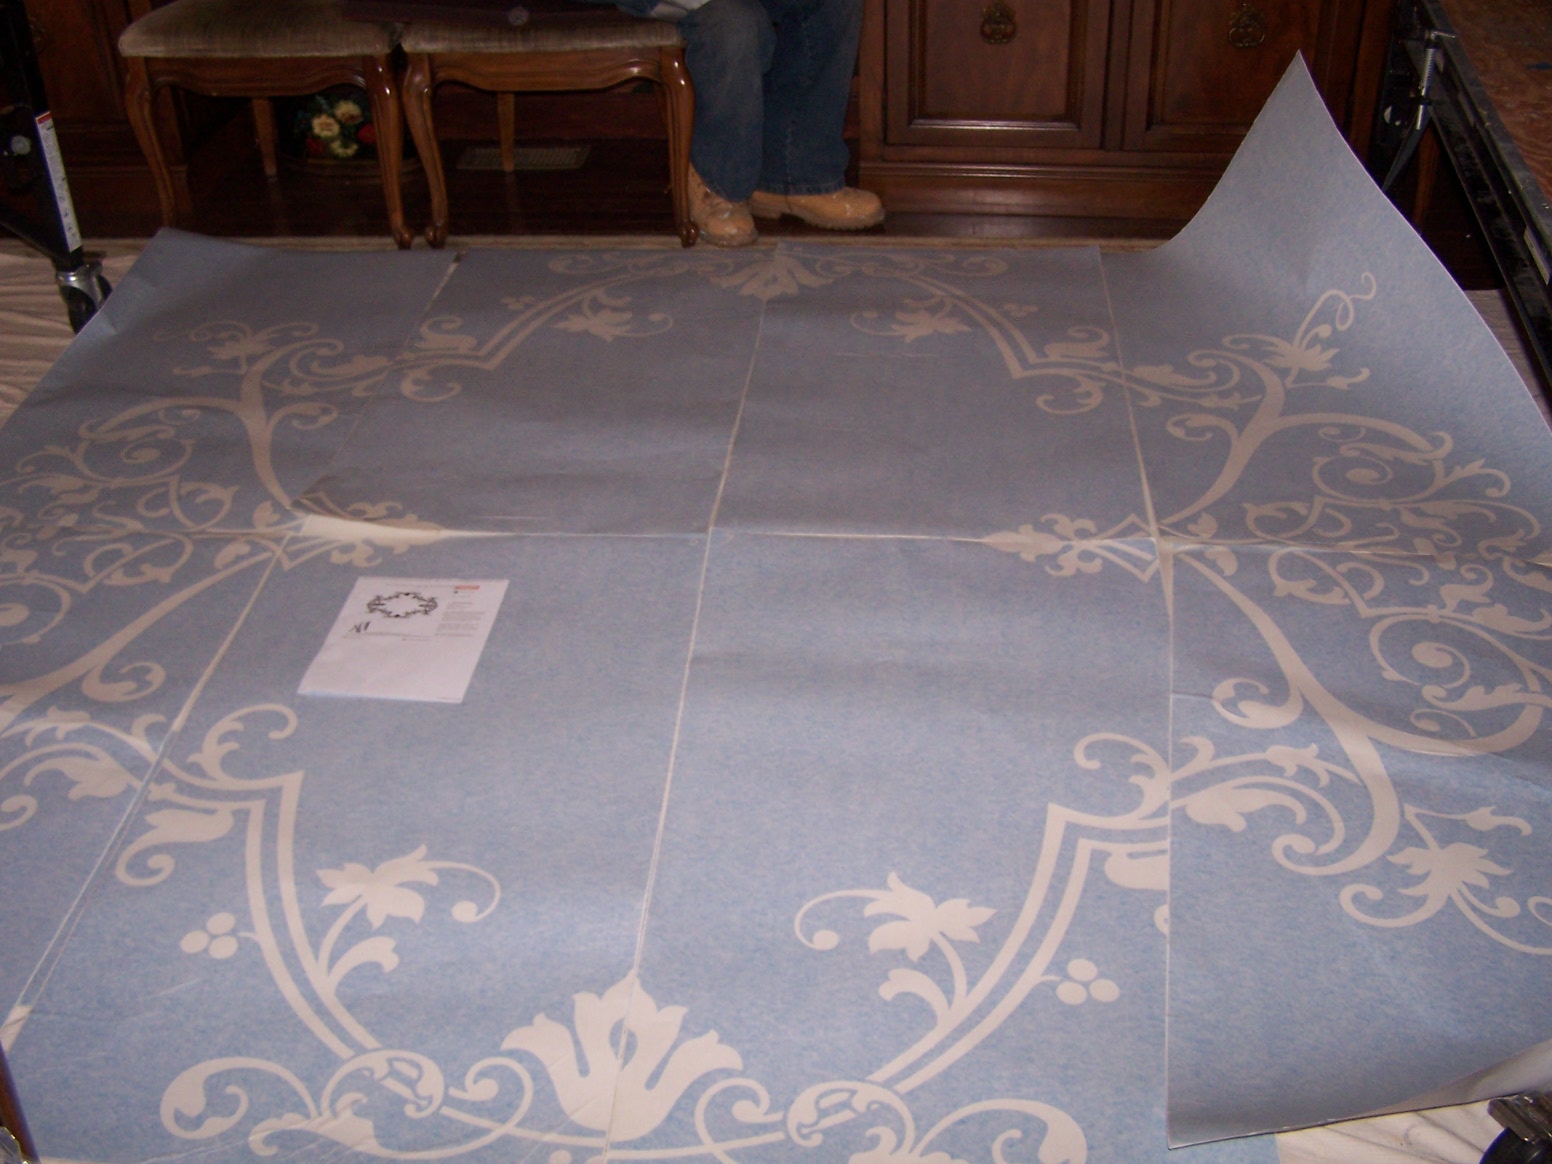
So, I went to my favorite stencil designer, Melanie Royals’ Modello Designs, and I ordered the largest stencil (a special, one-time use one) I had ever seen – and got to work! Here it is laid out on the floor – Yikes!

Above, the first part of the stencil is adhered to the ceiling. That only took about an hour to get put up correctly!.

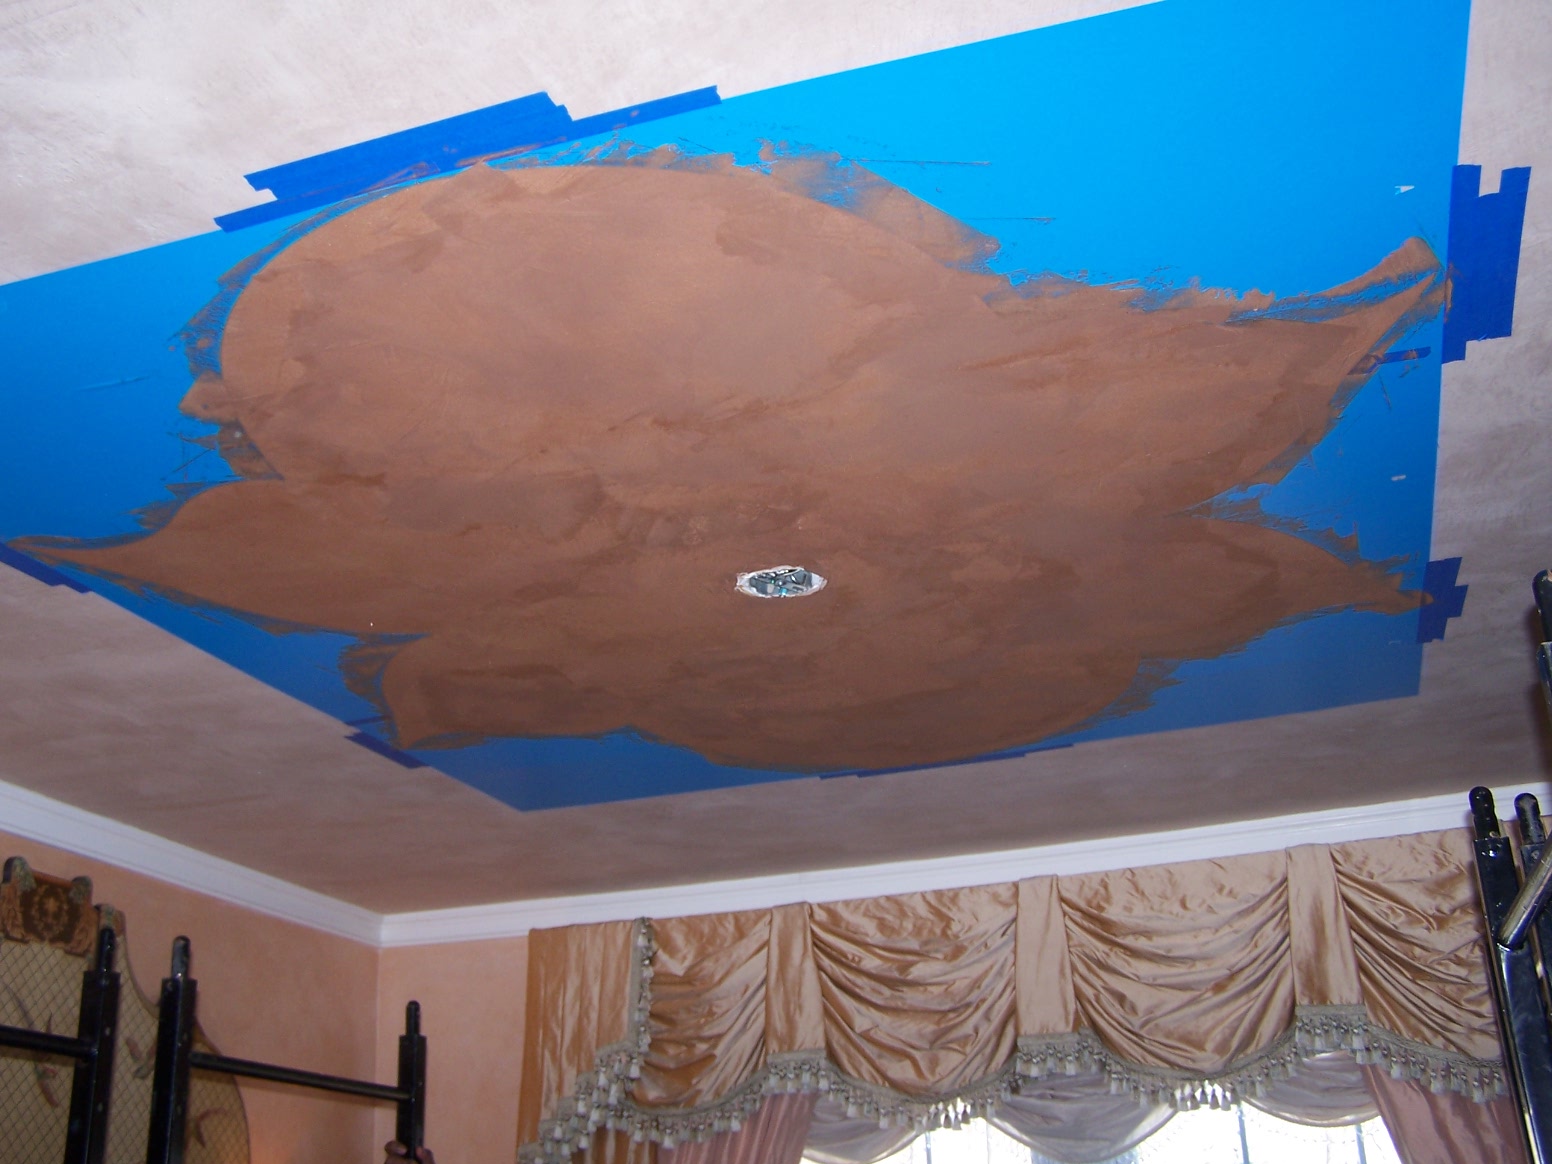
Then I added 2 layers of Brown Metallic Plaster for the first part of this process.

Once the plaster is dry, you put up the next part of the stencil.
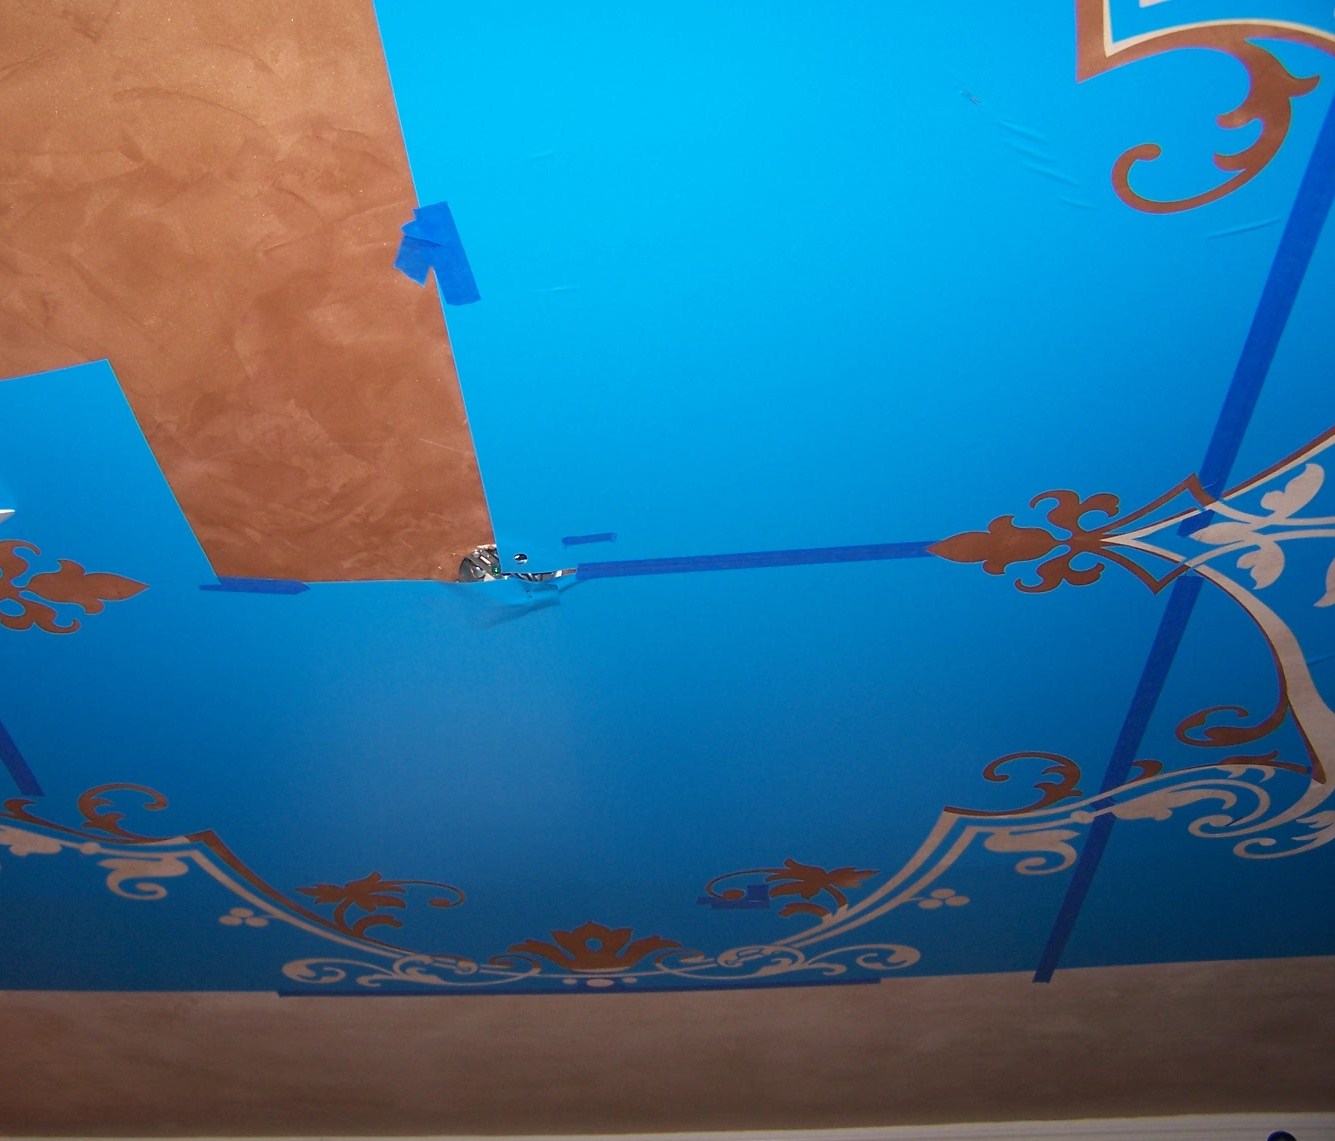
That only took about 2 hours!!! Eh, maybe longer!
For the scrolled part of the design that was on the Brown, I troweled an antiqued metallic gold plaster and then I threw some large Mica flakes onto it while wet so there’d be a bit more bling! More bling than this?? For the scrolled parts that were on the lighter part of the ceiling, I alternated between the Brown and the antique gold plaster being troweled on.
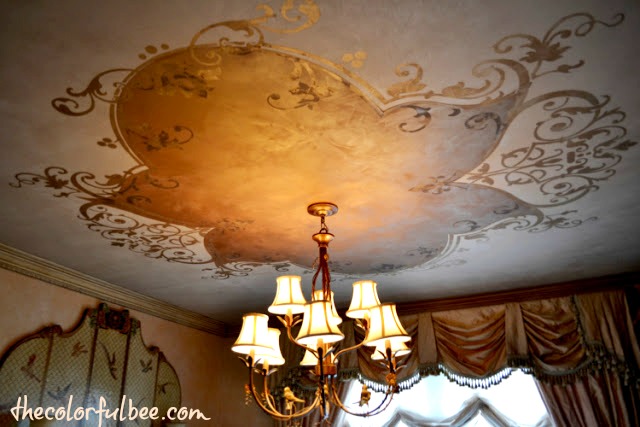

I love how it came out. When you sit at the dining room table, the design helps to make the room more intimate. Now when I go into this room, I’m happy! I’ll even sit there and pay bills! It was hard to do (a lot of measuring, which is not my forte) and you do need an extra set of hands to help you place it on the ceiling (and to give you a rest when your back and neck are aching!).
I have done many different stencil designs on ceilings before – but they were smaller and easier to do. This takes more time, patience and skill…but it is well worth it! Melanie has a lot of helpful directions on her website – so if you are thinking of doing something like this – you’ll have some help along the way. Start out with something small (like a design in the four corners of a ceiling). Do something manageable before you tackle something like this!
If you would like to read how to do a somewhat simpler version of this technique, click here
Baby update: My daughter had the baby while I was writing this post. Little Peyton weighed in at 7 pounds 13 ounces and mother and baby are doing great!
Thanks for reading. I welcome all your comments and questions!
Linking this project up to…
Thanks for stopping by The Colorful Bee! Stay in touch and never miss a post.
*Subscribe to receive an e-mail when a new post is up, HERE.
*Subscribe to receive an e-mail when a new post is up, HERE.
38 Comments
Posted in Decorative Finishes, interior design, Makeovers, Paint, Tutorials
 Decorative Finishes
 Interior Design
 Home
Home Garden
 Holiday
 Makeovers
 My Life
 Business
 Tutorials
 Videos
 Paint
Paint