
-

-
Subscribe
Thanks for stopping by The Colorful Bee! Stay in touch and never miss a post. Subscribe to receive an e-mail when a new post is up, HERE.Sponsor
If you're interesting in advertising on The Colorful Bee, click here to learn more.Contact
You can also email me at Linda.Leyble@gmail.com -


Categories
Subscribe
Popular posts
-
Recent Posts
Blogroll
Links

Tag Archives: gold leafing
5 Things to Paint in a Day (or Less!)
I always need some instant gratification…how about you? I thought I’d post some easy things to do when you want to update some items you already have in your home. Paint is the quickest, easiest and least expensive ways to transform just about anything!
Mirrors…
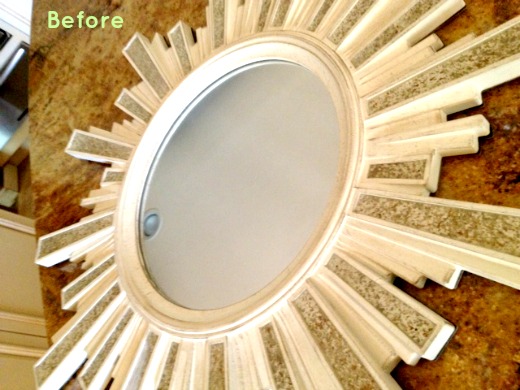
And after… (more…)
Thanks for stopping by The Colorful Bee! Stay in touch and never miss a post.
*Subscribe to receive an e-mail when a new post is up, HERE.
*Subscribe to receive an e-mail when a new post is up, HERE.
Favorite Projects and Blog Posts from the Past Year
Hello everyone! I hope that you are all enjoying your holidays and some much needed time off. I thought I would have some down time – but, as usual, a few clients need my help before the New Year. I don’t know why this happens to me every year – but it does! Not complaining at all…but I was looking forward to some rest. Yesterday I finished a logo on a gym floor (oh my aching knees and back) and tomorrow I am helping a client move into a new home. I had a few minutes, so I thought I’d share my most popular posts…in case you might have missed a few! Happy Holidays and a very prosperous New Year to you all!!
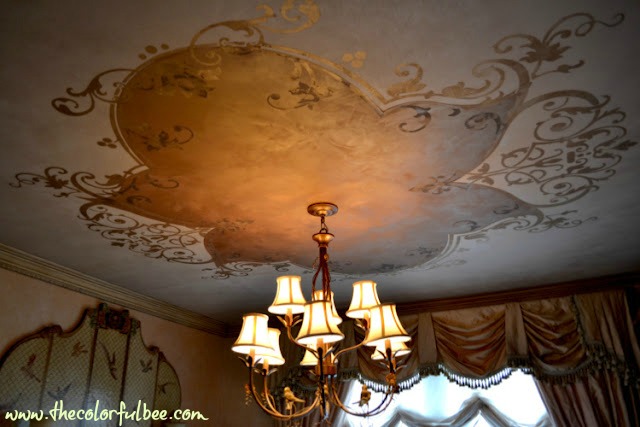 My Dining Room Ceiling: You can read about how I created this step-by step here
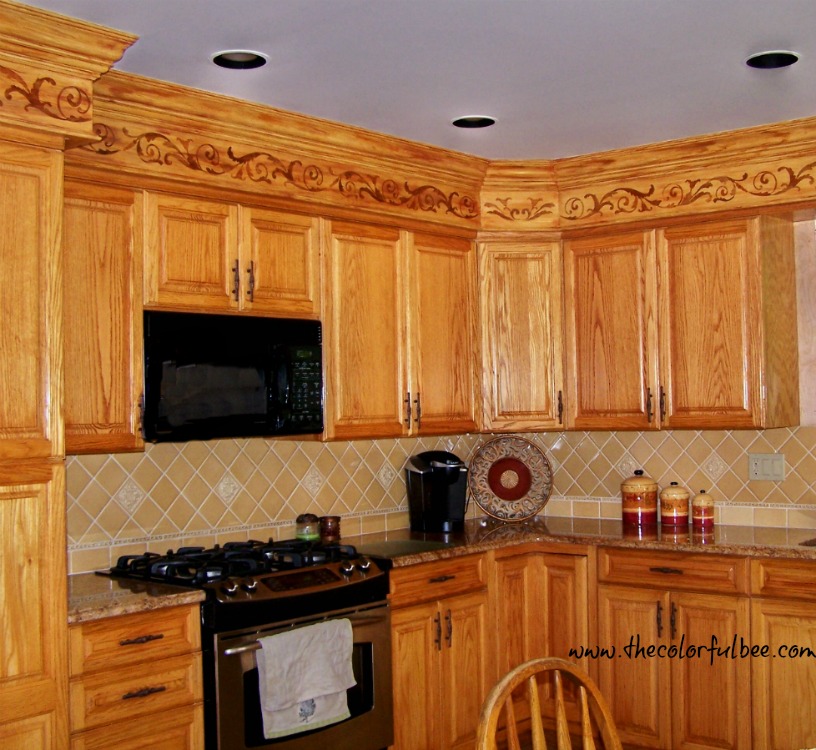 A Creative Way to Disguise Ugly Kitchen Soffits: Read about how I helped a client transform her kitchen very inexpensively here.
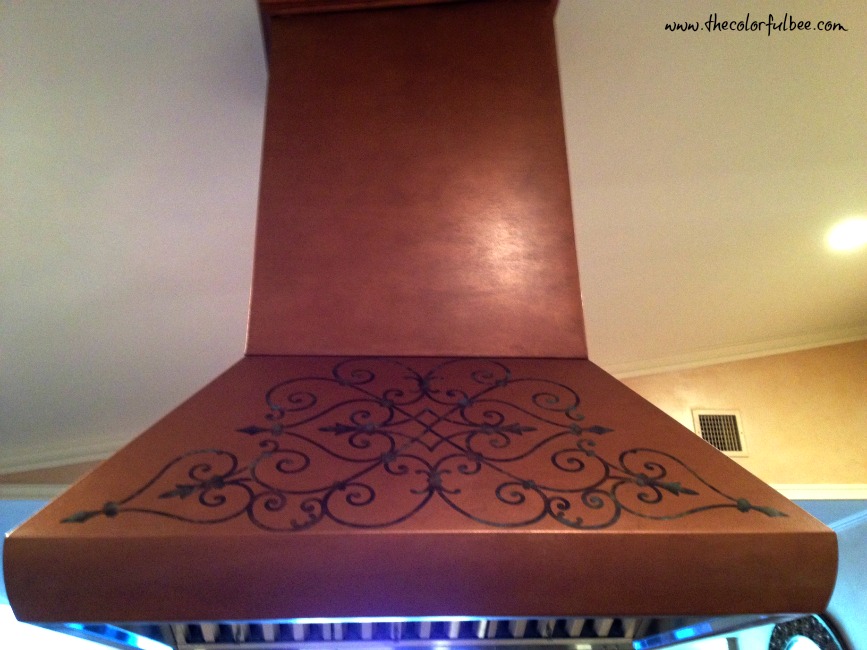 Here’s how I helped a client transform her ugly commercial range hood into a design statement. Click here for the steps I took to do this.
 My how to antique and gold leaf a mantle was pretty popular on the blog as well.
 And so was this tutorial on how to do a stried wall treatment and how I transformed a powder room that the homeowner was finally proud of.
Hope you enjoyed this! Comment below and let me know what projects you were most proud of this year!
Sharing this with: Katherine’s Corner
Thanks for stopping by The Colorful Bee! Stay in touch and never miss a post.
*Subscribe to receive an e-mail when a new post is up, HERE.
*Subscribe to receive an e-mail when a new post is up, HERE.
2 Comments
Posted in interior design, Uncategorized
Easy Ways to Gild and Use Metallics on Moldings and Furniture
I may be impetuous most of the time but there’s one thing that I do that involves some level of organizing and planning – I make samples before going all out on a color or technique for a wall, molding or furniture. This is especially helpful if you are new to using a product. Investing a small amount of time in testing a color, product or technique on a sample board or a piece of molding – will save you not only money but a lot of time as well. This small sample can also be useful when you go shopping. When you’re hunting for fabrics etc, it’s easy to tote around a 3 inch molding with the color you just painted your coffee table with.

Pearl base with gold metallic paint on design, then pearl stippled over it
Using Gold and Pearl Metallics: Above is a sample I did a few years ago for a client in NYC. I had to do a different finish on his crown moldings because he neglected to tell me that the moldings had about 100 layers of paint on them! You need a smooth surface for metallic paints to look great. I wound up using a Sandstone texture on them and I made them look like limestone moldings.

This Nina Campbell wallpaper and my molding might make a beautiful powder room or small entryway design
Flash Gilding: This is a gold leafing technique where you put the adhesive size on here and there (not on the entire piece) and it’s typically done with Schiabin – which are the leftover skewings from creating gold leaf. You can use gold leaf also but you will have a lot of waste.

After the leaf is on and dry, you burnish it with a soft cloth first and then with a brush to get it into crevices and to wipe away the leaf that did not stick. I toned this particular sample with Dark Brown Faux Color from Faux Effects. This effect looks beautiful on carved moldings and furniture.

For the more dramatic, this color Nina Campbell wallpaper and a flash gilded crown molding
I had tried using metallic foils on moldings once before – at a trade show 5 or 6 years ago – so I felt it was time to do some samples with it. I had a warm red molding collecting dust in my studio – so I figured I would try some gold on that first.

For less decorative moldings, I usually just tip or highlight the edges and I make just one edge a little thicker with whatever metallic I’m using. I didn’t want it too heavy, so I sanded back a bit to distress the metallic foil. For the thin lines, I either use a very small brush to apply the size (I used Wundasize) – and sometimes I even use the tip of my finger to apply the size. When the size comes to tack, you apply the metallic foil – with the shiny side up. Then you apply pressure with a fairly stiff brush (I used a stencil brush) and transfer the foil to the molding. You can then antique it, like I did.

I toned the molding with some eggplant and dark brown glaze
You can choose to have more of the gold showing but I prefer a more aged look. I first toned it with Eggplant Faux Color from Faux Effects – but I wound up adding some Dark Brown Faux Color to mellow it a bit more.

I pulled together some fabrics that could be used in a relaxed room with my molding sample – perhaps as a coffee table, entertainment unit or bookcase
And finally, I wanted to try the foil on a more ornate piece that was lighter in color – to see if I could get close to the flash gilding sample. Well, I learned something by doing this. The sample I did with the metallic foil came out hardly looking like there was any gold on it at all after I toned it! So, with lighter colors – when you are antiquing – you should put more foil on than you think.

After antiquing, you could hardly see the foil
With metallic foil, it’s very easy to go back and add more foil to a piece. And, if you add too much, you can sand it back and antique it to push it back a bit – so I find it’s very forgiving.

This foil technique came close to the flash gilding technique
If the foil is too flashy, you can wax it with dark wax, which will tone it down. I’ll probably do this.
Hope you enjoyed my metallics post. You might also enjoy my posts about using metallic foils in artwork and gilding and antiquing a Swedish clock. I love using metallics on moldings and furniture so much that I have to hold myself back sometimes so as not to do it “too much.” Let me know how you are using metallics and foils.
Sharing this with…
Thanks for stopping by The Colorful Bee! Stay in touch and never miss a post.
*Subscribe to receive an e-mail when a new post is up, HERE.
*Subscribe to receive an e-mail when a new post is up, HERE.
5 Comments
Posted in interior design, Tutorials
How to Create an Heirloom: Easy Way to Add Years to New Furniture
Sometimes you buy a piece of furniture that you love but when you get it home it just doesn’t seem to “go” with your home. This happens to me every now and again – unless I’m buying an antique. I find that by giving it a little bit of antiquing helps quite a bit.

Before: Our Swedish clock before I antiqued it
I purchased a lovely Swedish clock that was reasonably priced – especially when I compared it to the real deal antiques that I’ve seen online. The all white clock just looked out of place in my traditional home. So – I got to work, giving it a bit of aging.
- First, I used a clear coat (Aquaseal from Faux Effects) on the entire piece. This seals the surface very well and ensures a better glaze. I let that dry.
- Then I added some adhesive size to some of the the edges of the clock – wherever I wanted to see some gold leafing that was fading. I let it come to tack (about a half hour or so) and then I ripped up some Dutch Metal Gold Leaf and put it on haphazardly wherever I put the size. Let dry.
- Next I mixed up some browns and golds into my glaze mixture (I used Faux Creme clear from Faux Effects) and set about antiquing the piece.
- Finally, after everything was dry, I mixed up some brown and dark brown colorant and dipped a chipbrush into it (and offloaded onto a paper towel) – and then I drybrushed here and there and on the edges to give it more age.
I loved the simplicity of it – just a gentle aging. But as I lived with it what annoyed me was the fact that the clockface still looked new! So I got to work aging the clockface. I just used some glaze that I had leftover from another project that was similar to the glaze I used for the body of the clock – putting it on with a chipbrush and then smoothing it with a badger brush (but you can use any soft bristled brush that you have on hand).

During the clock face aging

Closeup of our clock
Now the clock looks like it belongs in my home. Everything in my home shows it’s age – including me, sorry to say! I may try to find an an antique clockface to really make it look like an heirloom. And I may do some handpainting on it to give it a little more character.
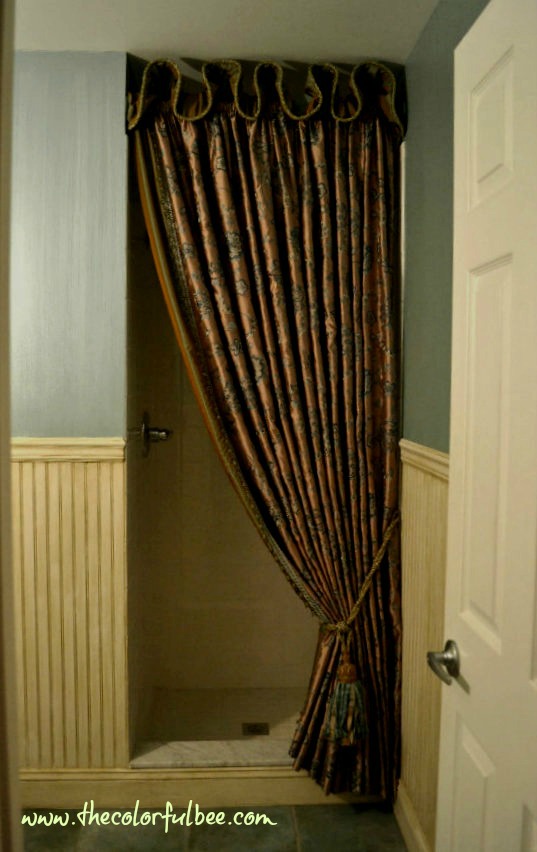
 I hope you enjoyed looking at my project! If you’d like to know more about the Venetian Plaster wall finish in the entryway, click here.
Sharing this with: Funky Junk Interiors; Between Naps on the Porch; Be Colorful; Home Stories from A to Z; BoogieBoard Cottage; Miss Mustardseed; French Country Cottage; Cherished Bliss
Thanks for stopping by The Colorful Bee! Stay in touch and never miss a post.
*Subscribe to receive an e-mail when a new post is up, HERE.
*Subscribe to receive an e-mail when a new post is up, HERE.
22 Comments
Posted in Uncategorized
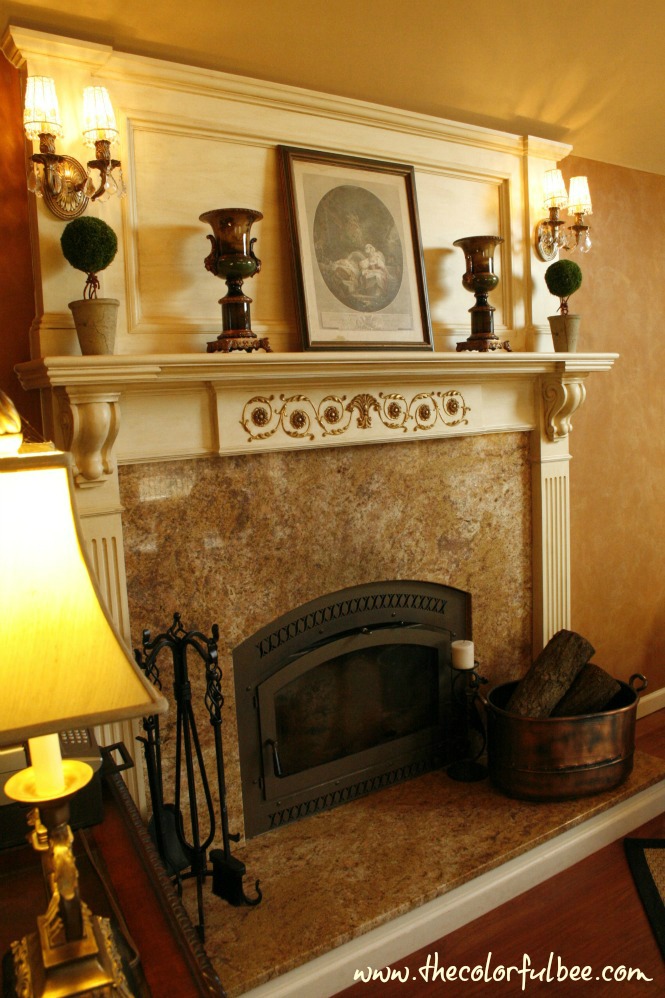
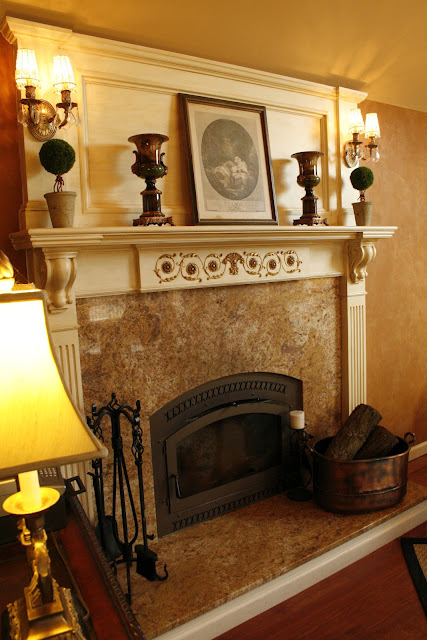
Gold Leafing and Antiquing a Fireplace Mantle
When I finally convinced my husband that we needed a kitchen renovation, I figured that if I got him that far…let me see if I can also get another room added on – a great room, off the kitchen. Amazingly he said “yes!” This was a few years ago – and I have been working on this great room since then. It’s been a work in progress.Since my laptop is in the repair shop (my hard drive was damaged…so I won’t have access to a lot of my pictures til next week or so), I’d like to share the pictures I do have to show you the work I did on the room.
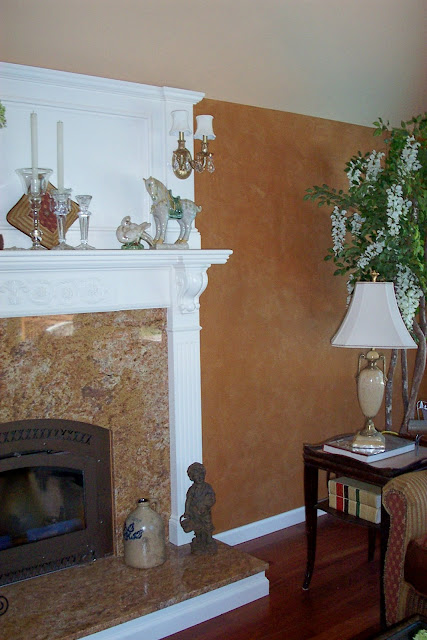


First Incarnation…
I was happy to finally have a fireplace and mantle in my home – yippee, something else to decorate! (And that tree was supposed to be on our deck then – sorry about that one). But having the mantle so stark white really wasn’t doing it for me. I had done a nice sueded plaster on the walls in a cinnamon hue – very Ralph Lauren-ish kind of look and feel (without it being Ralph Lauren material!)…and I loved the warmth of it.
So – what’s a girl to do to make it all come together? Add some decorative onlays, gold leaf them and then antique the entire mantle.

Mantle…After
The gold leafing (or gilding) of the onlay gave the mantle more distinction and character, I think. And the antiquing gave the onlay a nice patina – and now the tone of the painted wood blends so much better with the finish on the wall. Before the white just shouted at me – I am so much happier with this look.

Closeup of gilded and antiqued onlay
GILDING STEP-BY-STEP…
-
I first painted the onlay with a yellow gold paint – this will help you out later…because not every piece of leaf will stick!
-
I used Gold Leaf sheets from Michael’s – nothing fancy. But after you put on the gold leaf size (the glue that makes the leaf stick to what you are gilding which you can get at Michael’s also) – let it come to a tack. Don’t put the gold leaf on when the size is still wet. Never place your finger on the size to check if it’s ready – use your index finger knuckle to check it.
-
Once it’s ready, place the sheets on your object and tamp them down softly with a soft artist’s brush. Once everything is on your onlay (or whatever you are gilding), take some cheesecloth and start to take and brush away the gold leafing that didn’t stick. You can use an artist’s brush to get into any crevices etc.
-
Once that’s done, use your cheesecloth to burnish the gold leaf – you’ll begin to see that it starts to get shinier. Now – the leaf sold at Michael’s and elsewhere is not real gold leaf…so the leaf will look a bit too brassy. But after you antique it (as I did – with the rest of the mantle), it will lessen the shininess. In addition, I took an artist’s brush and took some dark brown tint and brushed it on to age and darken it.
-
Optional: You can also use a dark wax (Annie Sloan’s Dark Wax or Liberon Wax etc) to do this as well. This will protect and seal your work
So – hope you enjoyed this. If you’d like to see a few more pics of this up close…click the links below to my website.
Happy Painting!!
Linking this project up to…
Miss Mustardseed Romantic Home Serenity Now French Country Cottage Funky Junk Interiors Home Stories A to Z My Uncommon Slice of Suburbia
Thanks for stopping by The Colorful Bee! Stay in touch and never miss a post.
*Subscribe to receive an e-mail when a new post is up, HERE.
*Subscribe to receive an e-mail when a new post is up, HERE.
13 Comments
Posted in interior design, Tutorials
 Decorative Finishes
 Interior Design
 Home
Home Garden
 Holiday
 Makeovers
 My Life
 Business
 Tutorials
 Videos
 Paint
Paint