
-

-
Subscribe
Thanks for stopping by The Colorful Bee! Stay in touch and never miss a post. Subscribe to receive an e-mail when a new post is up, HERE.Sponsor
If you're interesting in advertising on The Colorful Bee, click here to learn more.Contact
You can also email me at Linda.Leyble@gmail.com -


Categories
Subscribe
Popular posts
-
Recent Posts
Blogroll
Links

Tag Archives: interior decorating
Why a New Ring Setting is Like Interior Design
A New Engagement Ring Setting is Like Interior Decorating? Yes!
A week before Christmas, I received an early present from my husband – a new setting for my engagement ring. I wanted this for such a long time but I always felt that it might be too expensive and that I should be happy with the actual ring that my husband gave me. It’s the memory thing, you know. I wanted to preserve the beautiful memory of my engagement and my wedding day.
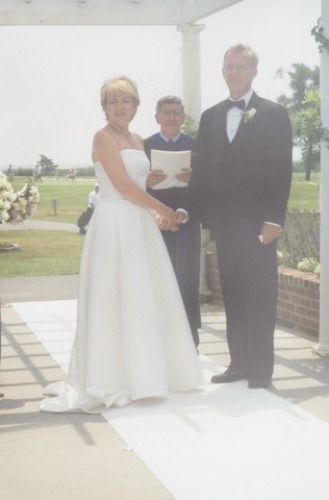
My husband Richard and I on our wedding day
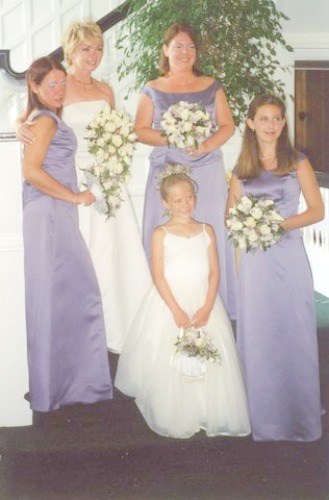
From left to right, my daughter Jessica, me, daughter Krista, stepdaughter Megan and granddaughter, Meghan
That was a blessed time in my life and I will never forget how I felt and how I still feel.
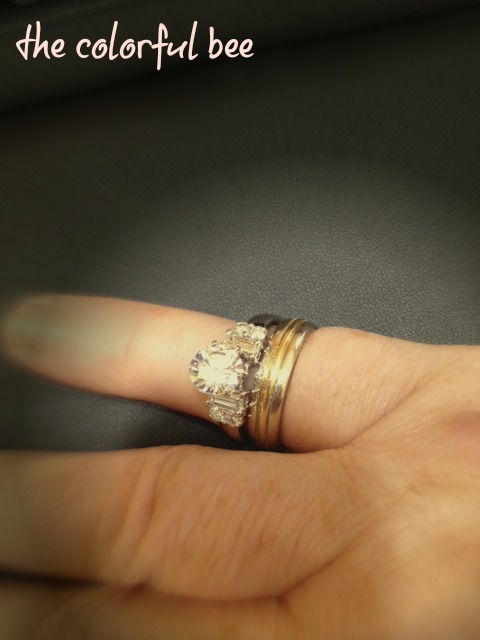
Trying on my rings and the new setting before resizing
But the reality of my rings were…
- My fingers had gotten fatter and I was lucky to be able to wrestle my engagement ring off my finger – not so lucky with my wedding band. That had to be removed by my jeweler professionally. They had to resize it for me.
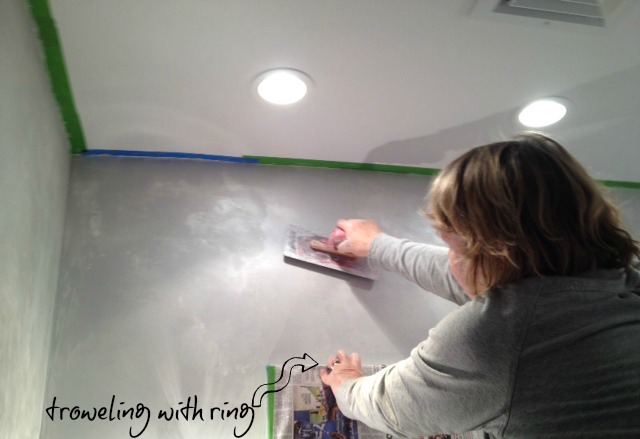
- I was in danger of losing my diamond because the prongs holding it were crooked. Might have been my years of troweling plaster and maybe that time when I had to run home to get something from my garage while on a job – and in closing the garage door, it slammed shut suddenly on my left hand, nearly breaking my fingers. I was really in pain after that and I was in the middle of a large Venetian Plaster job, so I had to keep going. Thank goodness it was my left hand that got hurt…and not my right (right-handed, you know!)
And speaking of troweling, you wouldn’t believe how many times I cleaned and soaked my rings. But that stuff got trapped in some of the teeniest crevices. So – because of daily use and the extra wear and tear that I put my rings through, they no longer looked good, at all.
How much did the new setting cost? $805. Not too bad. And now this really clear and nearly perfect ¾ carat diamond, sits higher up with the new setting (so it looks bigger and more important than it really is) and 6 new baguette diamonds flank it on either side – plus 2 baguettes from my original ring. The setting still resembled the original setting – but much better. My jeweler also informed us that two of the original baguettes were made of broken diamonds, which some in the industry use to repurpose their diamonds that have broken. The settings get sold as whole diamonds – but, in reality, they are not. So, when my husband bought the ring for me, he understood that the total carat count, with the baguettes, was a full carat. That was not true.
So, the reason why I bring this little story up is because I can relate it to how many people might feel about hiring an interior decorator or other design professional. Silly, you say? No, not at all. There are so many people who would like to redesign one or more of their rooms but maybe they lack the talent or energy to do it…and they think that hiring a professional would cost too much money (just like I thought about the cost of a new setting!) So – they do nothing. Even though they have outgrown the current design and it no longer suits their taste or the function of the room. Or maybe they tried to do a few things on their own – and they failed…so they stopped.
They didn’t realize that a designer would do a small project or be available on a consulting basis.
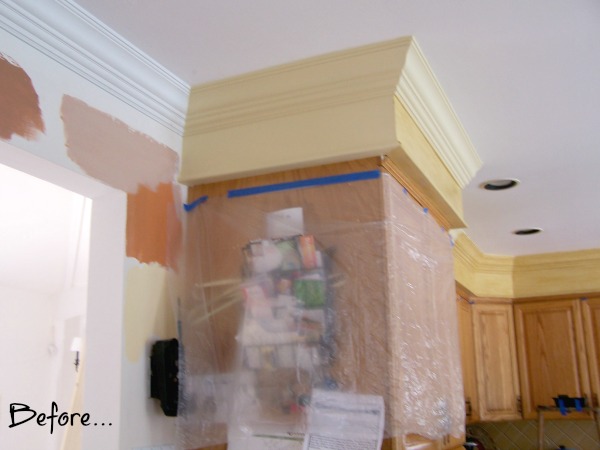
First we added crown molding and started to paint the soffits and crown
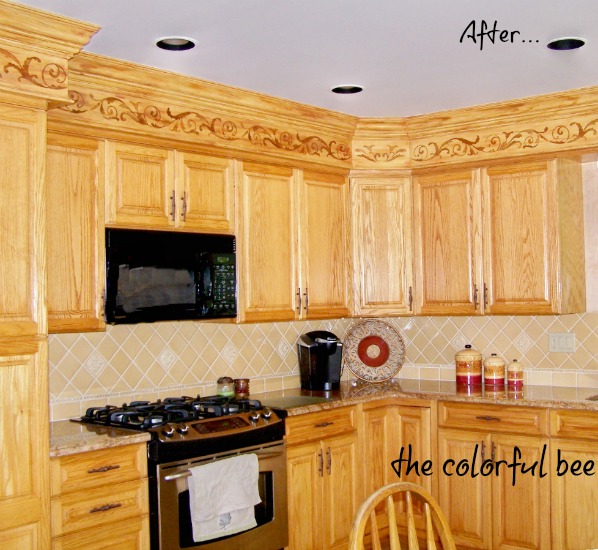
The finished project
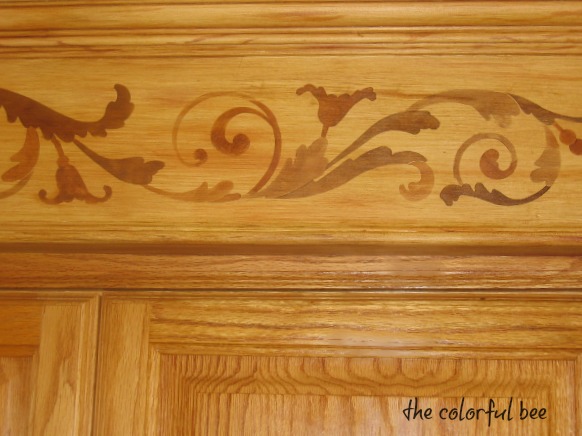
They would love to hire a designer but feel their budgets would be too small…that designers are just too expensive. They don’t realize that a designer’s creativity could save them a lot of money. The kitchen that I helped a client revamp, took 3 days to do. We added crown molding and then faux oak grained them and the soffits to match the cabinetry – plus we added a faux inlaid marquetry design that added a little punch to the kitchen. This was a much less expensive way to update a kitchen than to gut and buy new cabinetry…and less stressful as well.
Not realizing that a designer can take the best and most beautiful things you have (your diamonds) and allow them to shine in a new setting (pun intended!), people shortchange themselves by not using the trained eye of a professional. A designer will use things that you already have, repurpose them and create a new and improved look – without busting the budget. Just like my jeweler took my small but nearly perfect diamond and made it look more important and impressive – a talented designer can do that with your room.
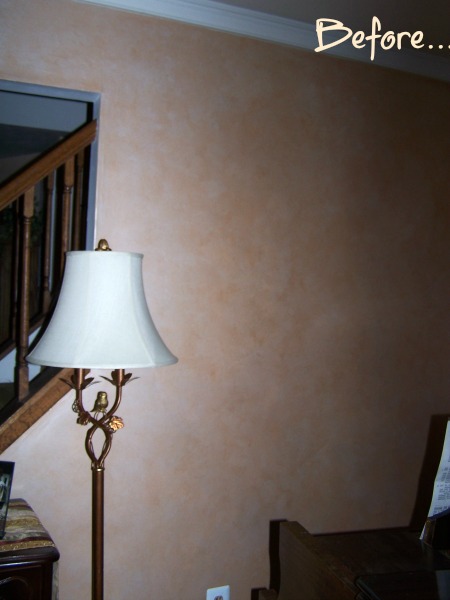
After, a lonely corner becomes a focal point
Designers think about things that you overlook. Just living your life – kids, work, stress, every day chaos etc impedes your keeping your home picture perfect. Do you now have too many things in your rooms – too much furniture? (Did your room get fat…just like my fingers??) Has your furniture, pillows, wall colors dulled with age (too much plastering with your rings on??) Most times the fix is simpler than you think.
Making an entryway more grand
Helping clients make an impact in their homes
A designer can help you achieve a unique and collected over the years look. With resources not available to the general public and with specialized training, a designer can assess the real value of what you have (crushed diamonds passing as full ones), repurpose your best things in a unique way (creating a unique setting that’s you and not cookie cutter).
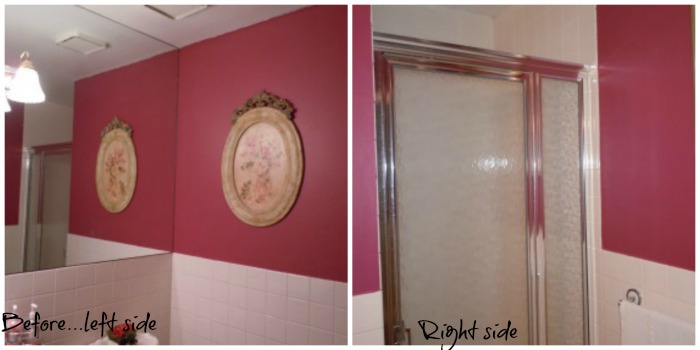
Before: A powder bath that my client was unhappy with
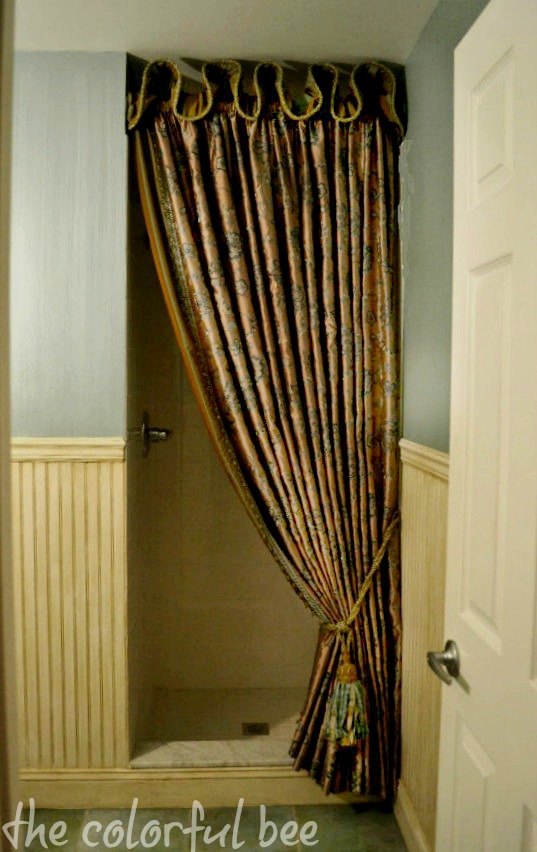
After: Since she never used the shower, we created a beautiful silk treatment to make this room more elegant
A designer can enhance the quality of your life in the space. Just like when I no longer received any joy from looking at my worn out engagement ring, the skill and knowledge a designer has can make living and entertaining in your room so much more pleasurable. In the above room, we added a beautiful teal and pearl stried wall finish and antiqued wainscoting and a silk treatment for the shower – to update and add elegance to this little powder room.
So, as I was admiring my new setting and feeling so good and proud of it, I saw that my husband was truly enjoying it also. Maybe it’s a little bit of “Happy wife, happy life,” but he feels that the ring just looks so beautiful now – in its new setting.
If you have been putting off doing something with your home, think about my little story. With the right person guiding you, your home can look and serve you better. It doesn’t cost as much as you think it does…and it’s an investment in your future happiness.
If you would like to feel happiness and joy when entering a room you no longer love – contact me.
Linking to: Between Naps on the Porch
Thanks for stopping by The Colorful Bee! Stay in touch and never miss a post.
*Subscribe to receive an e-mail when a new post is up, HERE.
*Subscribe to receive an e-mail when a new post is up, HERE.
6 Comments
Posted in Decorative Finishes, interior design, Makeovers, My Life
Color Roundup: Using Black in Interior Design
OK – I know that you might be a bit scared to use a lot of black in a room (especially on your walls). But if you haven’t tried it, I encourage you to use black in at least one of your rooms for 2013. As you’ll see in the examples I’ll show you today, black – when used correctly – lends sophistication, drama and punch to a space.
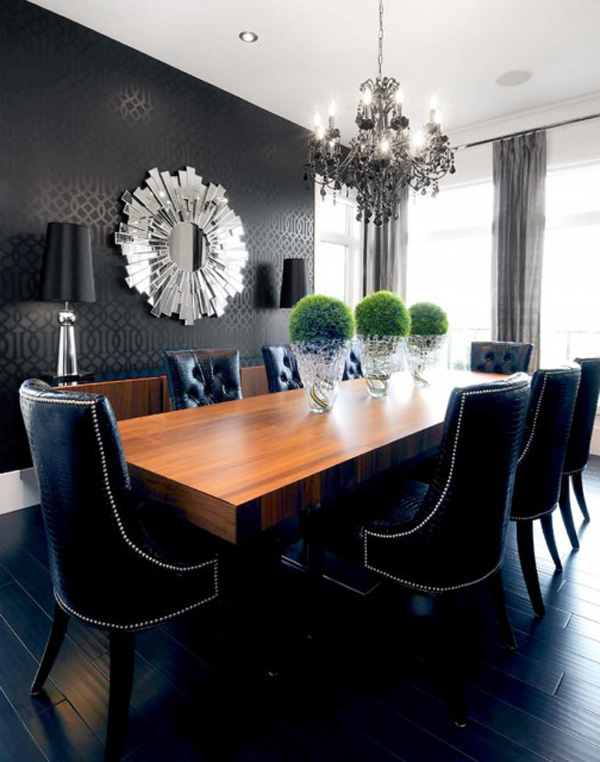
 In a rustic room, black adds a restful quality to this light-filled space designed by Thom Filicia. He used Pittsburgh Paints Black Magic as the color.
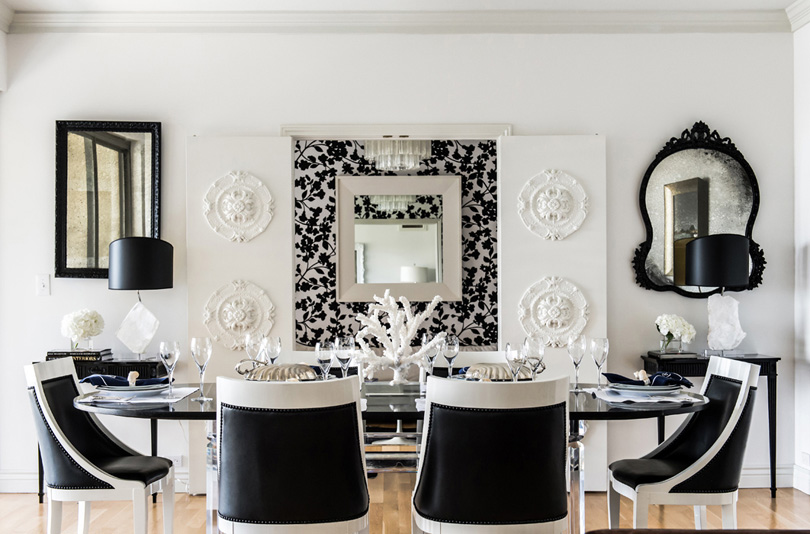
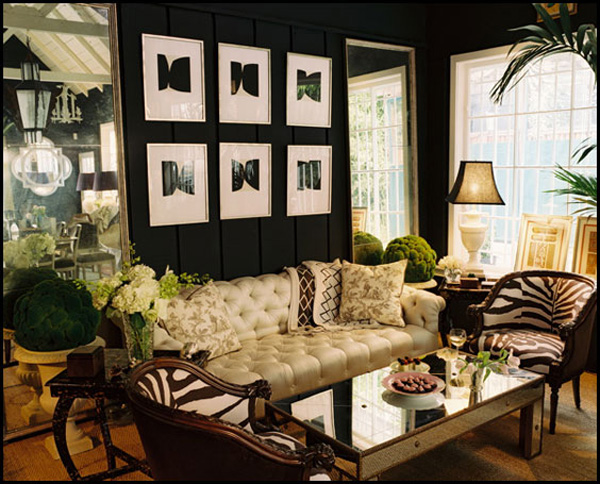 A room with a lot of natural light, large mirrors, some cream upholstery and matted artwork doesn’t look dark and moody. Contrast always brings interest and light to a seemingly dark space.
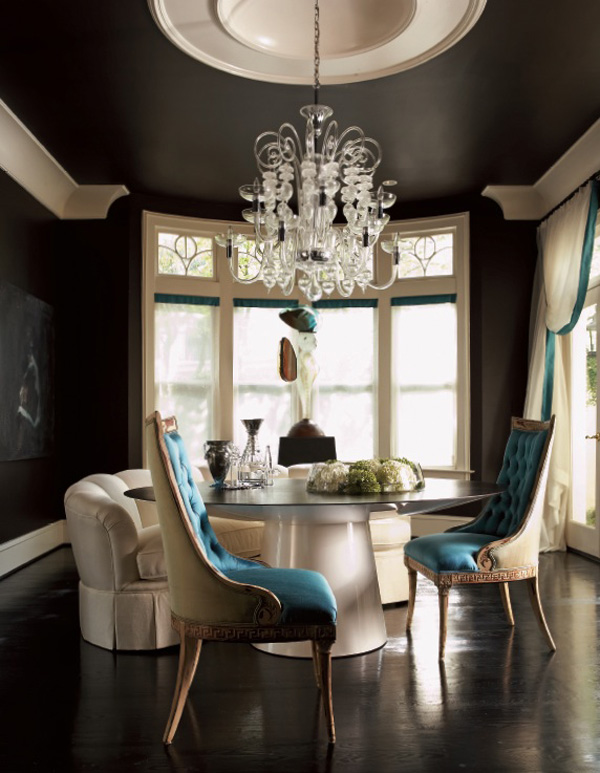
 In small, intimate spaces – black can be the impetus for conversation and reflection. Add sprightly dashes of color to make sure talk and meditation are positive!
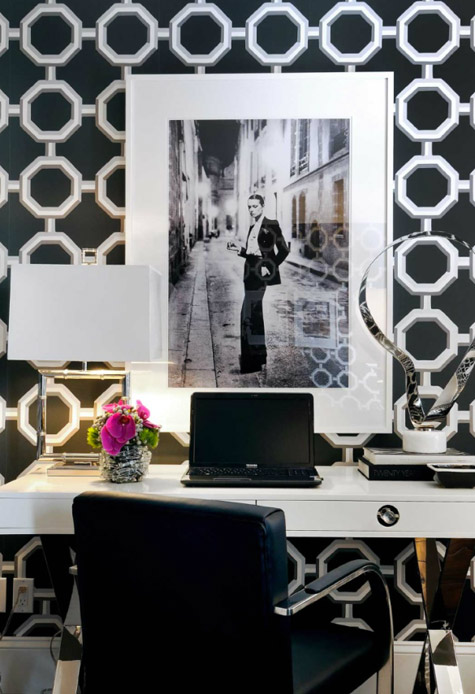
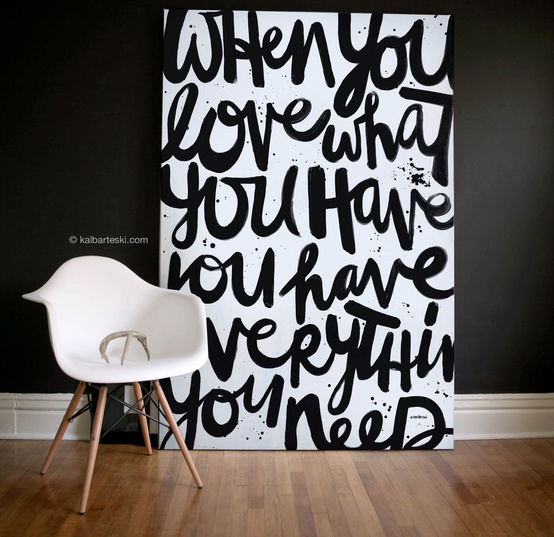 The graphic nature of black and white lends itself easily to artwork. Not only does this piece speak in text…it speaks in emotion, volume and contrast.
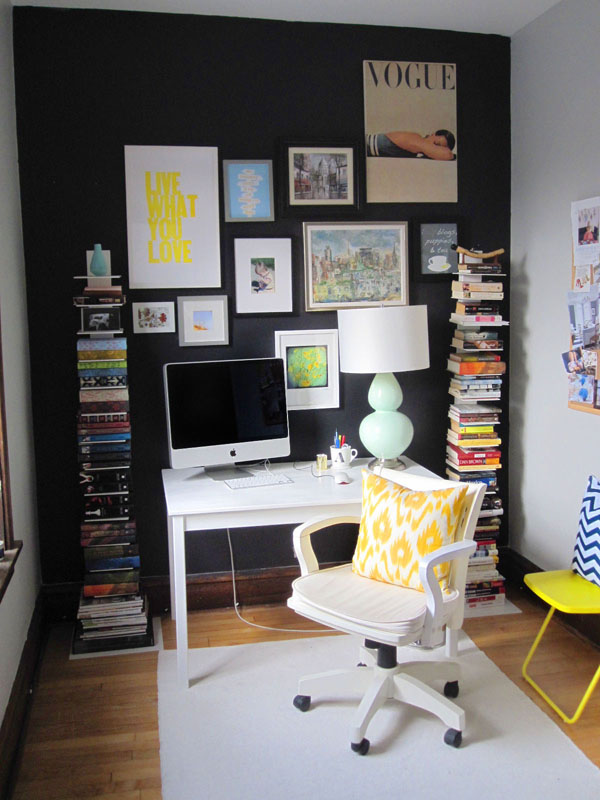
Using Black Chalkboard Paint…for Interest, Functionality and Art

My blogger friend, Michelle, created this beautiful black chalkboard wall in her home that is not only functional – but beautiful as an accent wall.
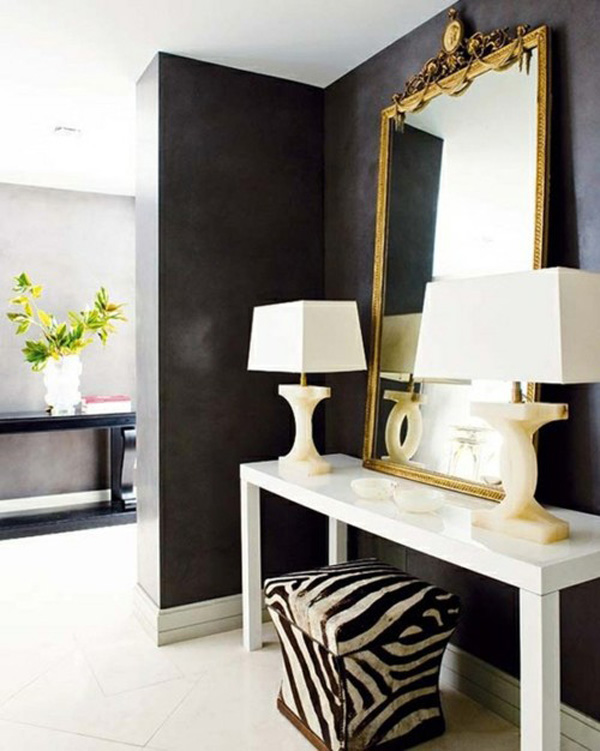
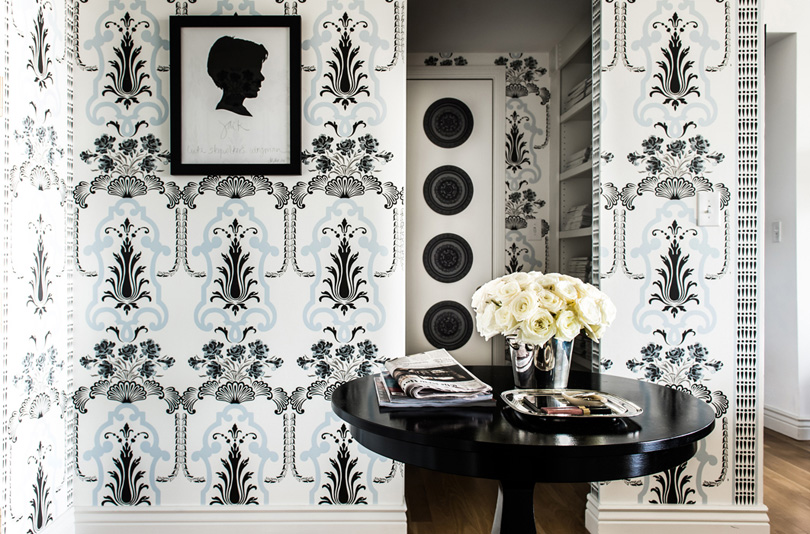
Using Black in the Entryway
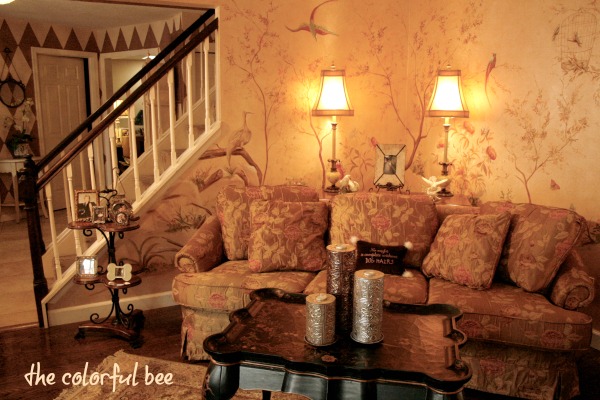
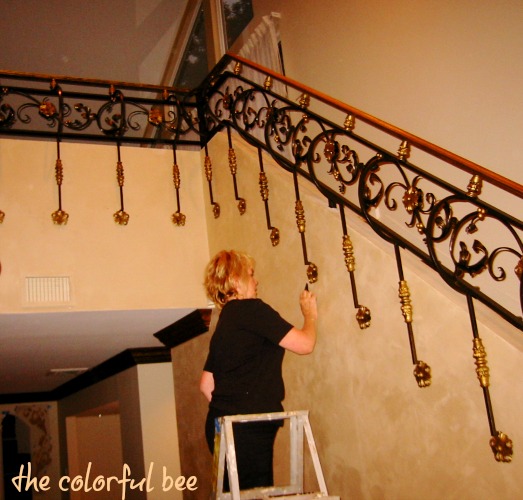
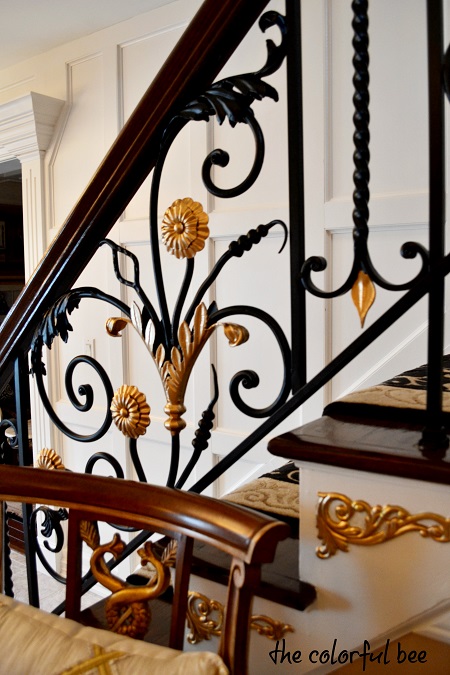
Black, even in small doses, can liven up an entryway. Whether it’s on a door, your stairs, in a wallpaper, lampshades or in a fabric – black will get noticed.


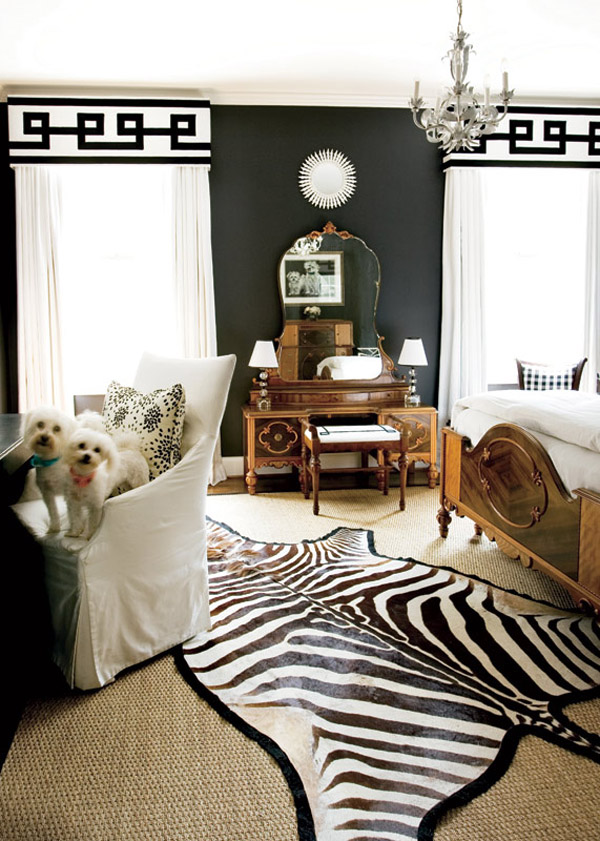
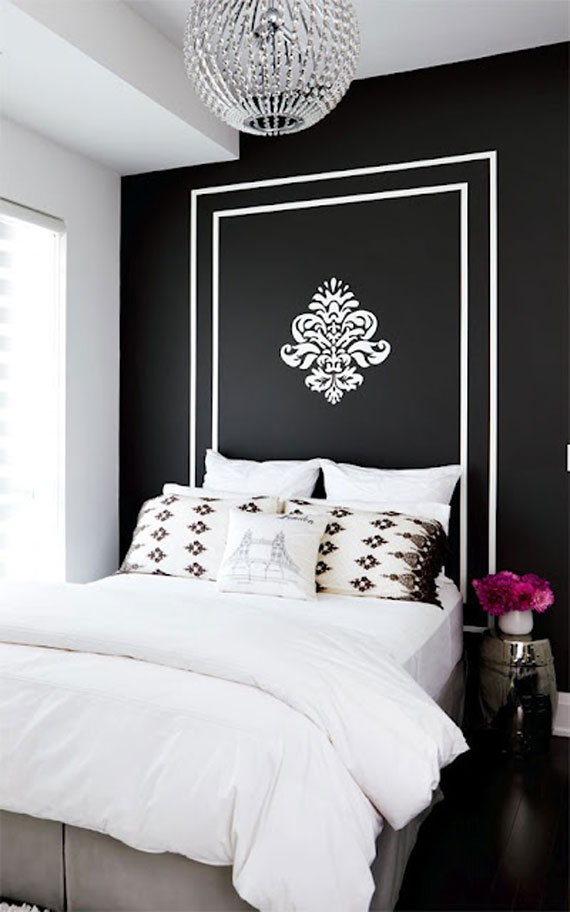
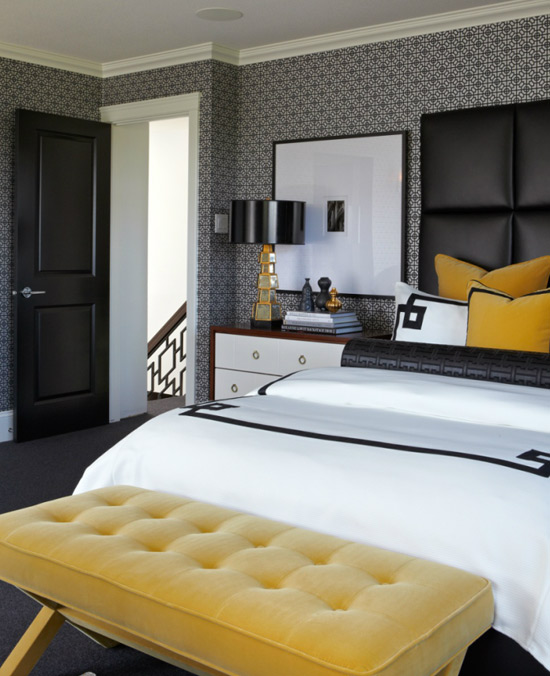
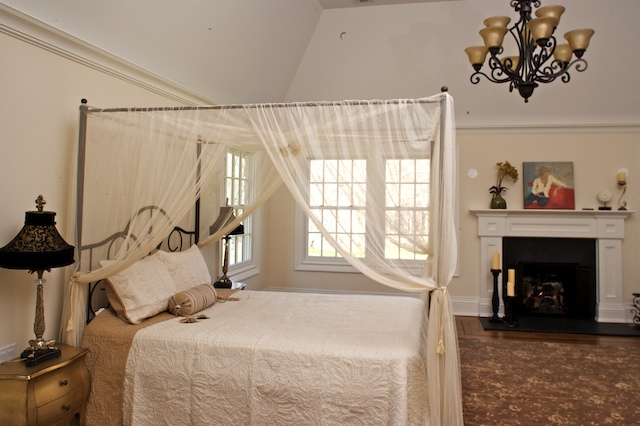
Using Black in the Bedroom
It’s the one space where you want enough peacefulness so that you can get some rest – so why not use some black. Add some white graphic draperies, to punch up the contrast…or stencil a faux headboard in gold for interest. Used as an accent wall – it’s a lovely way to be dramatic in a soft way. In a very feminine room, adding black will help your husband or significant other to feel more “at home.!”
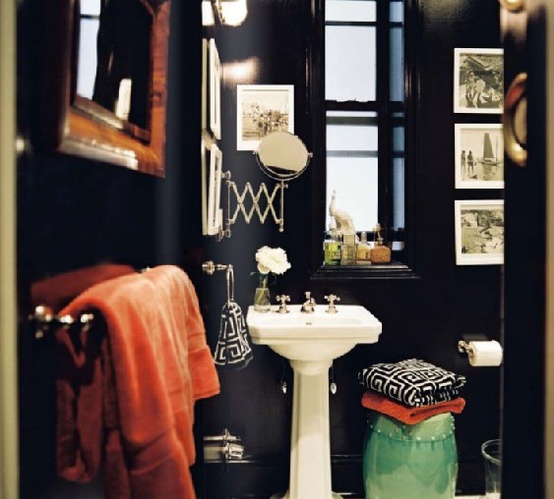
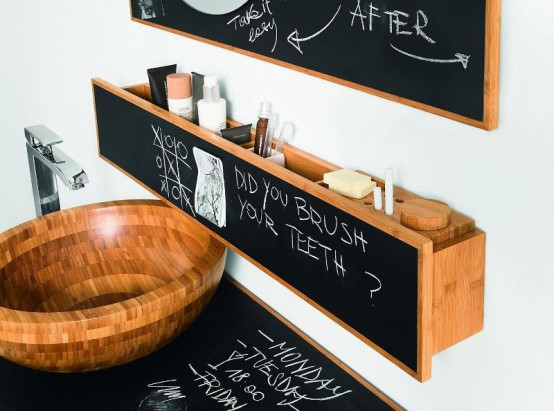
Black in the Bath
Black works in small spaces as well. Why try to hide a small space – celebrate it by giving it some stature. What about adding a jolt of color to a black bath – like yellow…orange…or green? For a child’s bath – add functionality and fun by adding chalkboard furniture. For an elegant and unexpected bath, how about a black vanity?


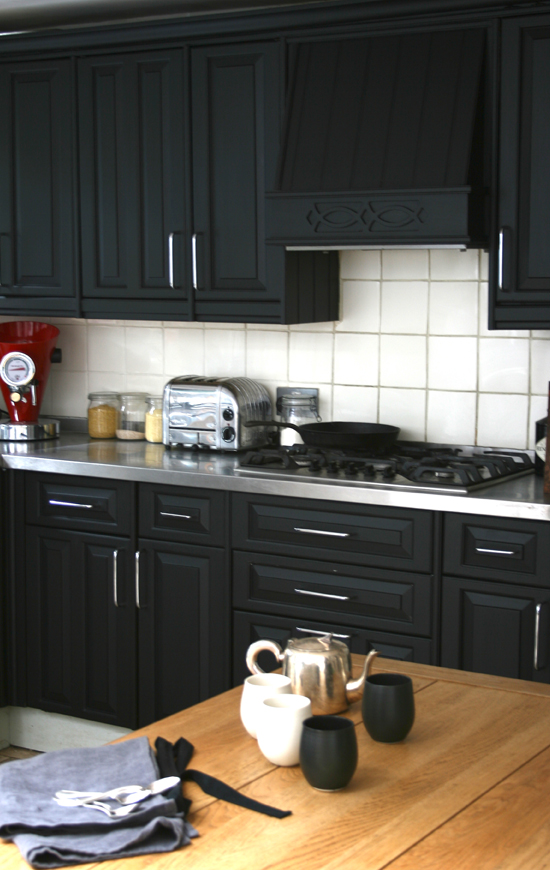
Black Kitchens and Dining Rooms Anyone?
Though very un-traditional, black cabinetry can update a tired kitchen in a hurry and under budget. A black dining room tells your guests that you are anything but predictable!
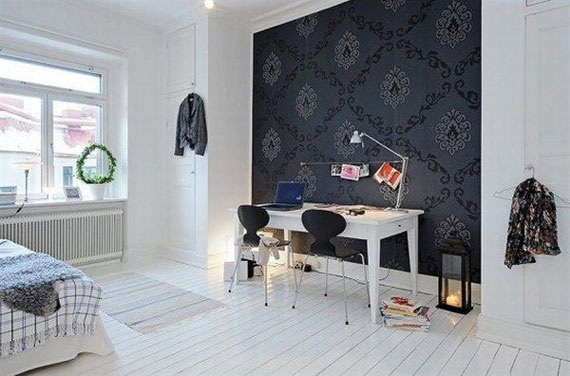
Using Black in Office Spaces
You want your office to be a place that is serious enough to be professional and believable yet fun enough to make you want to spend a lot of time there – in a space that inspires you to be creative. Black fills the bill.
Some Favorite Blacks: Martha Stewart’s French Bulldog Black; Benjamin Moore’s Black Satin; Pittsburgh Paint’s Black Magic.
Not quite ready for all black? Try charcoals like Benjamin Moore’s Iron Mountain and Witching Hour.
So – I hope that I have convinced you to, at least, think about using black in your rooms. A small accent…a focal wall…a full 4 walls of black – I know that you will love the punch and liveliness that this {supposedly} lack of color can add to your space!!
If you have used black in your home – even just painting a piece of furniture in black…let me know your experience in the comment box below! Ah come on! Leave a comment – even to tell me how you feel about black interiors!!
Image credits: 1) Thom Filicia vis House Beautiful 2, 10, 14, 19, 22) Freshome 3, 6, 11,12, 23) via Impressive Interior Design 4) Art by Barteski 5) Michelle 7) Architectural Digest Espana 8) Via The Lennox 9) via Desire to Inspire 13) Atmosphere Interior Design 15) unknown 16) Alberto Demel via Cocoboro 17) Cocoboro 18) BodieFou 20) Atmosphere Interior Design via Freshome 21)
Thanks for stopping by The Colorful Bee! Stay in touch and never miss a post.
*Subscribe to receive an e-mail when a new post is up, HERE.
*Subscribe to receive an e-mail when a new post is up, HERE.
5 Comments
Posted in Color Roundup, interior design, Paint
Color Roundup: Soft Blues and Blue Greens
Soft blues, blue greens, and gray blues on walls, fabrics, cabinetry and furniture never fail to please. These colors can instantly put you at ease. Here’s a roundup of some of my own designs…plus selected images from the web that feature these hues.

This blue gray zinc finish is one that I am planning for my own Master Bath

A soft cream glaze over blue, with French script and floral stencils from Royal Design Studio, that we did in a Designer Showhouse

Benjamin Moore’s Buxton Blue in a beautiful living room

We used a soft blue green metallic plaster for this guest bathroom. Besides being beautiful – it doesn’t get affected by water and humidity

Benjamin Moore Staffordshire Blue with a pearl glaze stried over it helps create a restful guest room

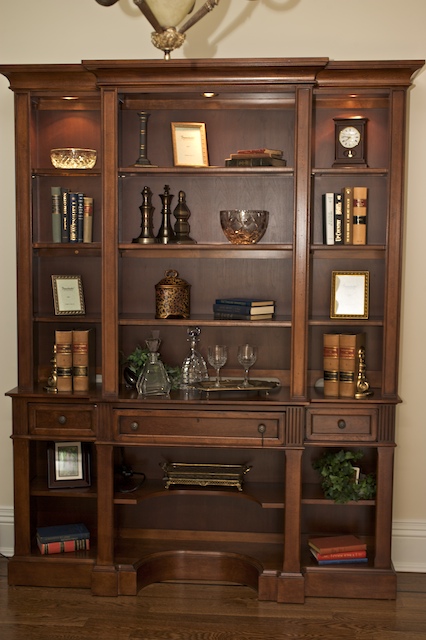
Soft blue shelf with collage of wallpaper
Image Credits: First pic, third pic, last pic. All others…The Colorful Bee
Sharing this with…
Between Naps on the Porch; Be Colorful; My Uncommon Slice of Suburbia; Cherished Bliss
Thanks for stopping by The Colorful Bee! Stay in touch and never miss a post.
*Subscribe to receive an e-mail when a new post is up, HERE.
*Subscribe to receive an e-mail when a new post is up, HERE.
2 Comments
Posted in Color Roundup, interior design, Uncategorized
Gold Leafing and Antiquing a Fireplace Mantle
When I finally convinced my husband that we needed a kitchen renovation, I figured that if I got him that far…let me see if I can also get another room added on – a great room, off the kitchen. Amazingly he said “yes!” This was a few years ago – and I have been working on this great room since then. It’s been a work in progress.Since my laptop is in the repair shop (my hard drive was damaged…so I won’t have access to a lot of my pictures til next week or so), I’d like to share the pictures I do have to show you the work I did on the room.
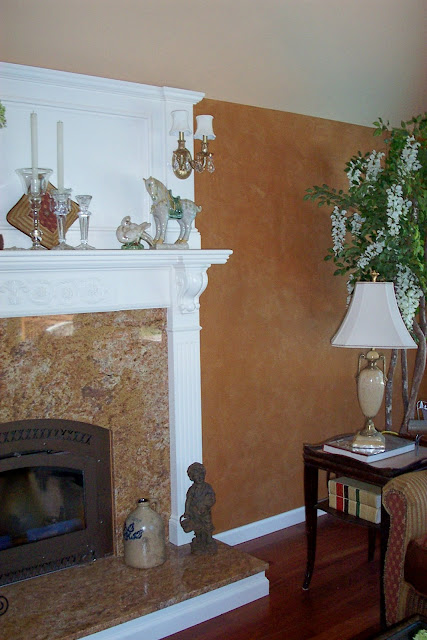


First Incarnation…
I was happy to finally have a fireplace and mantle in my home – yippee, something else to decorate! (And that tree was supposed to be on our deck then – sorry about that one). But having the mantle so stark white really wasn’t doing it for me. I had done a nice sueded plaster on the walls in a cinnamon hue – very Ralph Lauren-ish kind of look and feel (without it being Ralph Lauren material!)…and I loved the warmth of it.
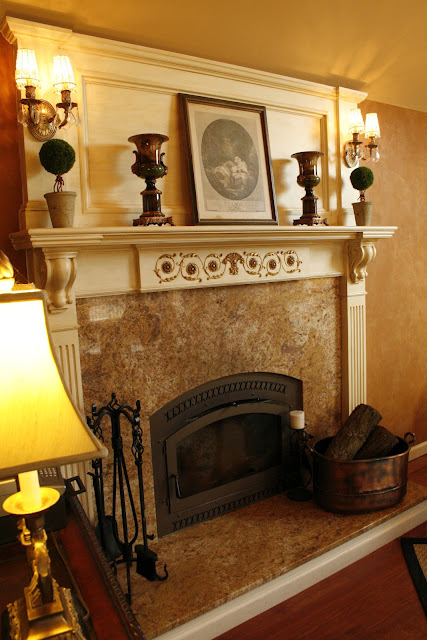
So – what’s a girl to do to make it all come together? Add some decorative onlays, gold leaf them and then antique the entire mantle.

Mantle…After
The gold leafing (or gilding) of the onlay gave the mantle more distinction and character, I think. And the antiquing gave the onlay a nice patina – and now the tone of the painted wood blends so much better with the finish on the wall. Before the white just shouted at me – I am so much happier with this look.

Closeup of gilded and antiqued onlay
GILDING STEP-BY-STEP…
-
I first painted the onlay with a yellow gold paint – this will help you out later…because not every piece of leaf will stick!
-
I used Gold Leaf sheets from Michael’s – nothing fancy. But after you put on the gold leaf size (the glue that makes the leaf stick to what you are gilding which you can get at Michael’s also) – let it come to a tack. Don’t put the gold leaf on when the size is still wet. Never place your finger on the size to check if it’s ready – use your index finger knuckle to check it.
-
Once it’s ready, place the sheets on your object and tamp them down softly with a soft artist’s brush. Once everything is on your onlay (or whatever you are gilding), take some cheesecloth and start to take and brush away the gold leafing that didn’t stick. You can use an artist’s brush to get into any crevices etc.
-
Once that’s done, use your cheesecloth to burnish the gold leaf – you’ll begin to see that it starts to get shinier. Now – the leaf sold at Michael’s and elsewhere is not real gold leaf…so the leaf will look a bit too brassy. But after you antique it (as I did – with the rest of the mantle), it will lessen the shininess. In addition, I took an artist’s brush and took some dark brown tint and brushed it on to age and darken it.
-
Optional: You can also use a dark wax (Annie Sloan’s Dark Wax or Liberon Wax etc) to do this as well. This will protect and seal your work
So – hope you enjoyed this. If you’d like to see a few more pics of this up close…click the links below to my website.
Happy Painting!!
Linking this project up to…
Miss Mustardseed Romantic Home Serenity Now French Country Cottage Funky Junk Interiors Home Stories A to Z My Uncommon Slice of Suburbia
Thanks for stopping by The Colorful Bee! Stay in touch and never miss a post.
*Subscribe to receive an e-mail when a new post is up, HERE.
*Subscribe to receive an e-mail when a new post is up, HERE.
13 Comments
Posted in interior design, Tutorials
Mood Boards and How They Help You Learn Your Style and Your Loves in Life
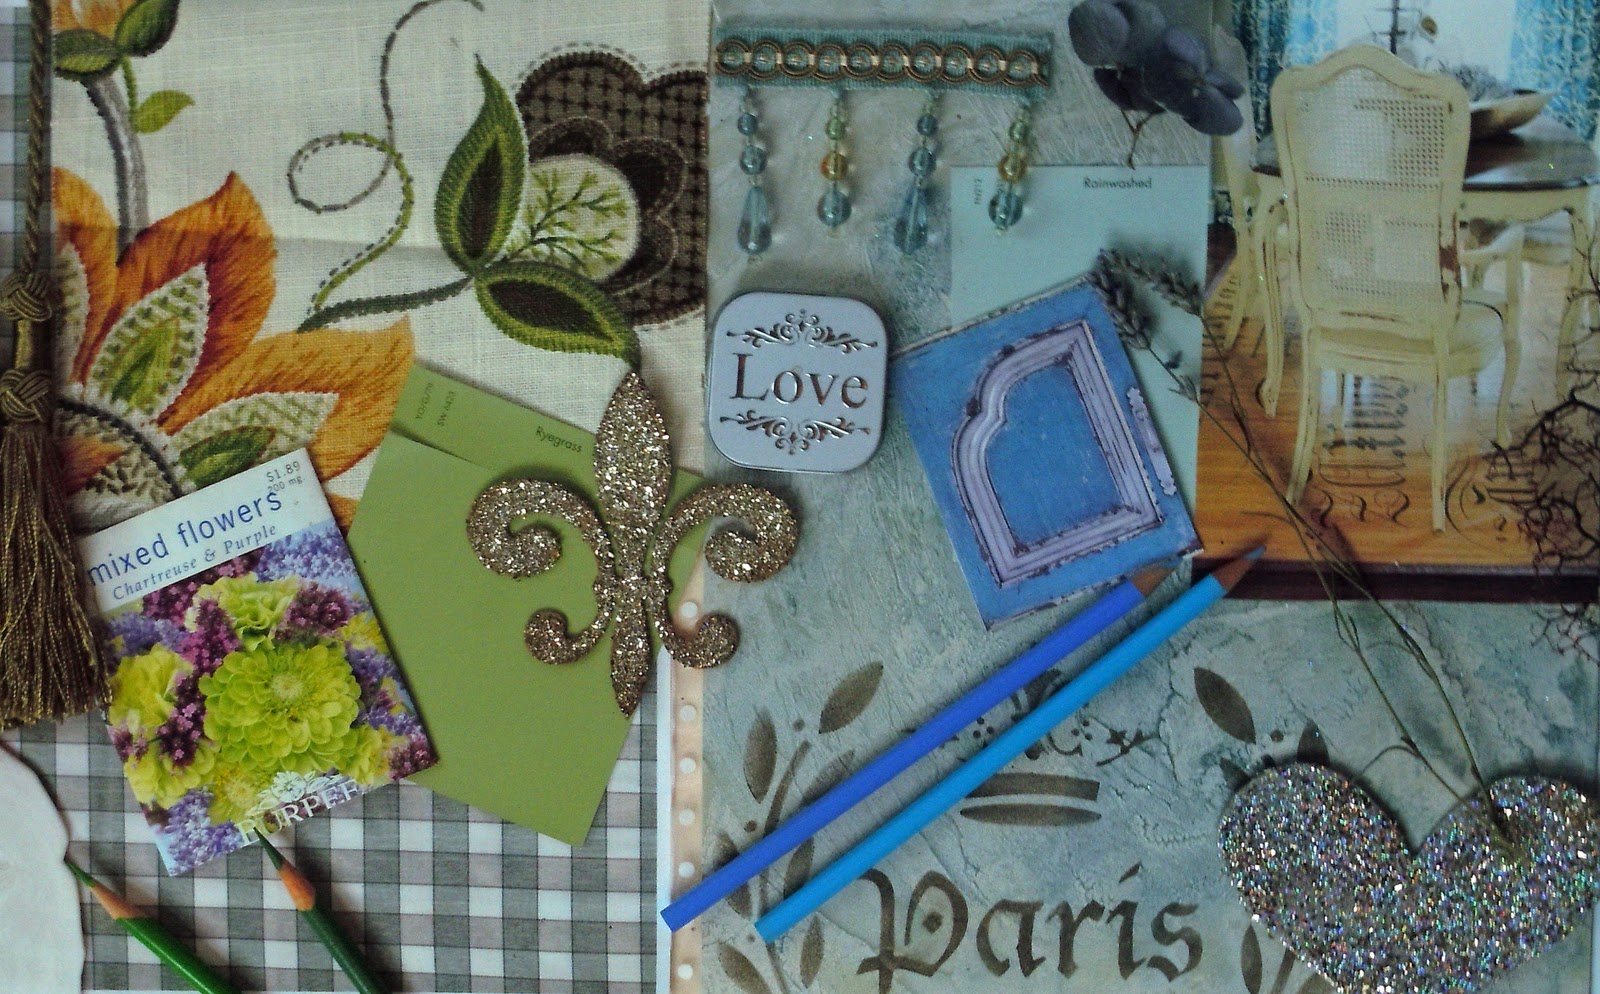
This is a mood board that I made to help me figure out some of my passions in life…
& some topics that I’d like to cover on this blog.
I made a list of my top 10 passions…
1) Love is number one – hence the heart and the word “love” on the small tin cover that I’ve had for many years that my husband gave me.
2) I love beautiful and colorful fabrics, trims, tassels – so they would naturally play a role in this mood board.
3) Nature is a big part of my life, so I included the seed packet, sand dollar, coral fan (you can see a little bit of it in the right side of the board), the dried lavender and hydrangea.
4) I adore Paris – and just about anything French.
5) I love a little “bling” in my life – hence the glitter on the heart and the Fleur de Lis. Oh…that’s bling and French!
6) I made those little ornaments – so my love of craft is represented also.
7) Texture plays a big role in my life – the backdrop of the right side of the board is a multi-layered texture that I created with a metallic plaster.
8) I love to paint and antique furniture, so images of these needed to be here. You can also see my love of texture in the antiqued furniture on the right side – plus the antiqued blue cabinet face has great texture and color to it.
9) The colored pencils are there to remind me to sketch more often because it relaxes me and it helps me to be more creative. They also represent my love of color.
10) Finally, the paint swatches are two of my favorite colors – green and blue.
I know that I could have kept (and soon will be!) adding to this…but keeping it simple helps me to zero in on the things that are most important to me that I want to cover in this blog.
Use Mood Boards to Help Your Put a Room Together. Creating a mood board is a great exercise to do also when you are creating a design plan for a room. On a board (or in this case – on a file folder) you can gather your fabrics, wall and trim color, carpet swatch, wood swatch – plus furniture and accessories that you would like to have in the room. When placed in close proximity – you can tell right away if your colors blend and you can gain a better sense of what the “feel” of your room will be.
Try this at home. I think you’ll have a lot of fun and I know you will learn something about yourself also. You may just come up with something wonderful that will evolve into a room design that will be more “you.” Feel free to email me some of your mood boards – would love to see them!
I did my mood board by hand (as I suggest you do), but you can also try an online mood board by visiting Olioboard and also Pinterest – which are online collections of mood boards and images that members collect and share.
On a slightly different note, there’s also a great site called Wishpot that’s a great tool that will help you organize items that you’d like to buy online. So, if you’re re-doing a room you can collect items from all over the web and keep them in this repository for future use. It’s also a great tool to use if you’re doing your Christmas shopping or anytime you’re shopping for gifts. It will keep you organized (as in you’ll be able to find the links to items you’ve saved) & inspired.
I am thinking of making Mood Boards a regular feature of this blog. What do you think?
Thanks for stopping by The Colorful Bee! Stay in touch and never miss a post.
*Subscribe to receive an e-mail when a new post is up, HERE.
*Subscribe to receive an e-mail when a new post is up, HERE.
A Beautiful, Well-Designed, Staged Home in Muttontown NY That Sold Quickly
Our sister company, Beautiful Staged Homes, created a wonderful, well-designed $3.5 million staged home in Muttontown NY. Staging a home for sale is a bit different than designing a home for very personal use…but this newly constructed home showed a potential buyer how beautiful their life could be, if they purchased the home. That’s what I think the purpose of home staging really is – it shows the buyer “how to live” beautifully, serenely – to live their “Best Lives.” It is a beautiful property – and it “sold” within 3 weeks of being on the market! So – in the higher-end market, staging can really make a property “a HOT commodity.”


We created some beautiful decorative finishes in this home…
- A gilded ceiling medallion in the dining room
- A soft metallic sage green plaster in the powder room
- A pearl stried finish on the dining room walls
- Several aged finishes on the furnishings throughout the house
Here’s a link to more of the beautiful rooms in this home
Photo Album of Muttontown Home
For more information about beautiful home staging contact Linda Leyble at 631 793-1315.
Thanks for stopping by The Colorful Bee! Stay in touch and never miss a post.
*Subscribe to receive an e-mail when a new post is up, HERE.
*Subscribe to receive an e-mail when a new post is up, HERE.
Leave a comment
Posted in Uncategorized
 Decorative Finishes
 Interior Design
 Home
Home Garden
 Holiday
 Makeovers
 My Life
 Business
 Tutorials
 Videos
 Paint
Paint