
How to Create Some Dimensional Art Pieces with Stencils, Plaster and Chalk Paint

I had promised a tutorial on how to do this awhile back on the blog…so here it is (a little late but here nonetheless!). I’ve been busy working in clients’ homes, so I apologize for my tardiness.
1) I used Faux Effects Sandstone rolled on for a quick bit of texture, let dry and then I stippled some of the texture all over and the took a trowel and lightly flattened the texture here and there. You can use any type of texture or textured paint for this step. Let dry
2) Next I did a quick roll of Annie Sloan Paris Grey over the texture. You could use an acrylic grey paint as well. Let dry.
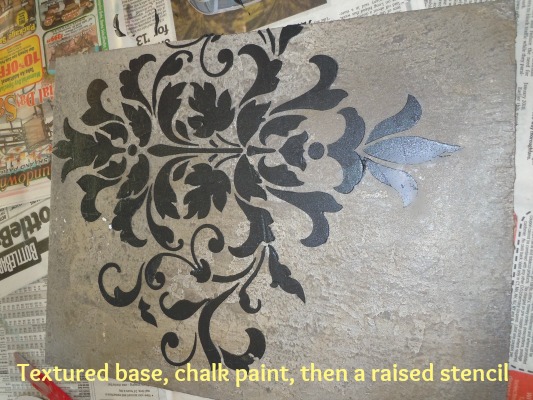
3) Next I took a Royal Design Studio damask stencil motif ( you could use some scrolls or tile stencils would look great) and I created a raised stencil design. I troweled Faux Effects Ebony Lusterstone through the stencil. I went for a fairly low build up – but you can opt for a more substantial thickness. Even Annie Sloan Chalk Paint in a dark color like Graphite would work great for this step (just let the paint stay out in the air for awhile or overnight to thicken it up) Let dry.
An easy way to trowel the material is to use a cut out square of styrene board (maybe a 3 inch square) and then round off the edges with some sandpaper. No need to buy an expensive trowel! This works great.
Note: You can opt to use a gesso, molding paste or joint compound for this step. If so, let dry, and then roll on black paint over the raised stencil. Do two layers of paint – and make sure you replace the stencil over the design first before you paint.
4) Once everything is dry, paint the entire surface with Annie Sloan Chalk Paint in Paris Grey – or whatever color you prefer. I did two coats.
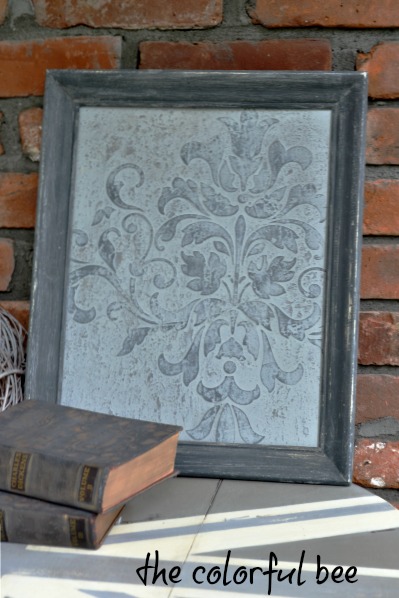
5) When dry, sand back lightly first to reveal some of the underlying texture. Then sand back more heavily in the areas you want to reveal – like the embossed areas. You can use some wet sandpaper or even a damp paper towel to help the process.
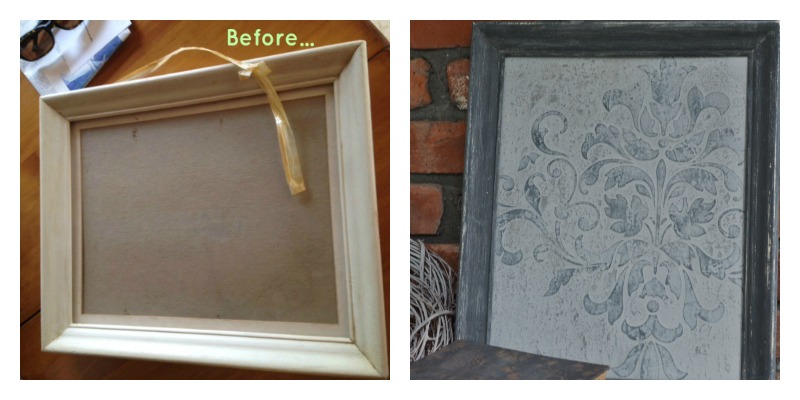
The Frame: For the frame (which I got for free by the way!) I just painted it first with some Annie Sloan Paris Grey and Chateau Grey – then I painted it with Annie Sloan Graphite Chalk Paint. I sanded back here and there to reveal some of the colors underneath.
Hope you liked this tutorial. Have you ever tried doing some dimensional stenciling? I love it – it works great on walls, furniture – and especially artwork. PRO TIP: Try practicing a bit before tackling it on something you want to be perfect. Just take your texture and the stencil and trowel through on a practice piece of cardboard or oaktag. Some people use stencil adhesive to prevent seepage through the stencil. If seepage occurs, simply (but carefully) use a Q-tip to wipe the excess away. This project doesn’t demand a perfect raised stencil – so it’s a great piece to do!
Let me know if you try this out…and send pics! Thanks!
Also – for a “How To” paint the Union Jack table, click here
Sharing this project with…Between Naps on the Porch


 Decorative Finishes
 Interior Design
 Home
Home Garden
 Holiday
 Makeovers
 My Life
 Business
 Tutorials
 Videos
 Paint
Paint