
As promised from yesterday’s post, here’s more detailed information on how I did this Union Jack design on an old coffee table. I did make some mistakes and I will point them out to you, so you will sail through this easily!
First, a little history of the Union Jack. It’s actually called the Union Flag (made up of the Saltires – heraldic symbols – of the Cross of St. George for England, the Cross of St. Patrick for Ireland and the Cross of St. Andrew for Scotland). The correct use of the phrase “Union Jack” is only for when it’s on a ship. Didn’t know that til this morning!
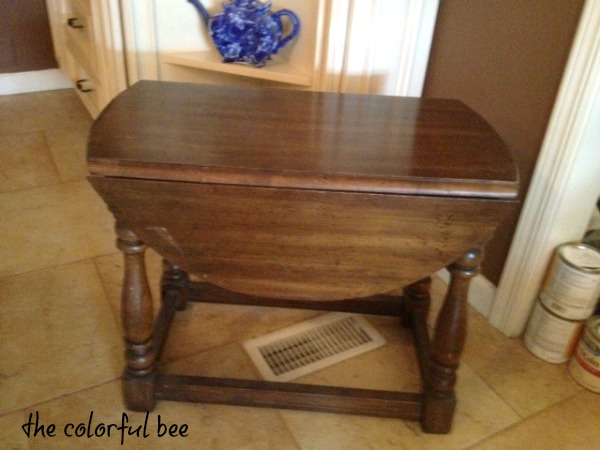
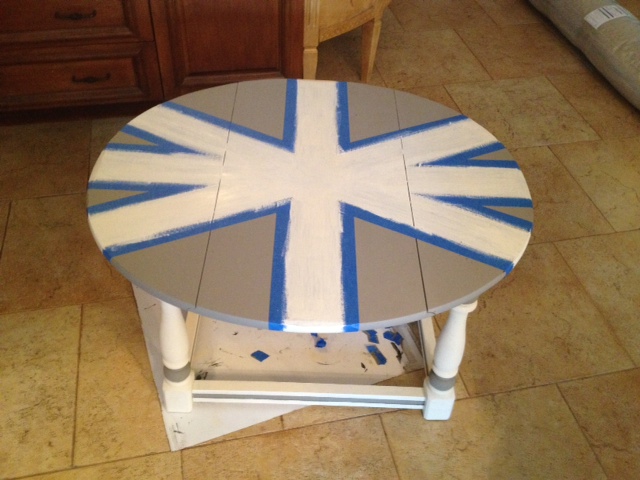
Instead of the usual red, white and blue, I used more neutral colors – Annie Sloan Chalk Paints in French Linen, Paris Grey, and Old White. For the legs of the table I used Old White and Paris Grey for the accents. Here’s the table I started with…
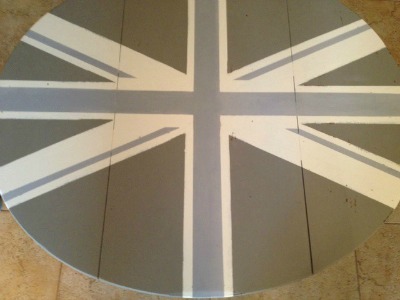
1) First, paint the table top in French Linen. Let dry – really (or else your tape may pull off to easily).
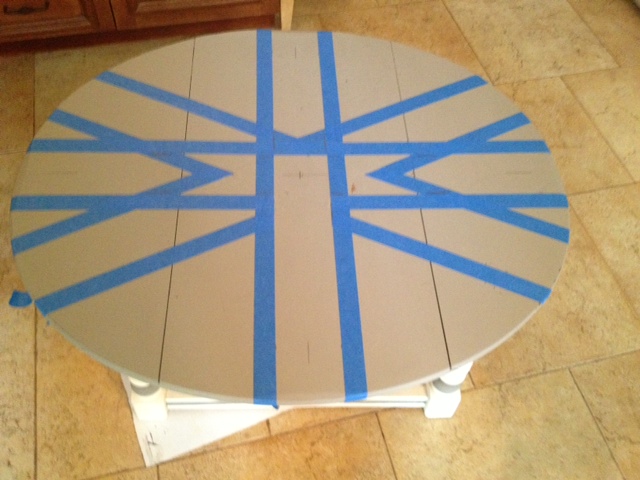
2) Mark off/pencil the horizontal and vertical, diagonal Xs. Your dimensions may vary but this is how I plotted it out: the vertical, horizontal and diagonal x crosses were 3 inches wide.
3) Tape out your design. You can use regular blue painters’ tape but make sure you burnish the edges so there’s no seepage. Or you can use Frog Tape for cleaner edges! Take a razor blade and score/cut where you need to, to complete the “X” designs. Keep a picture of the Union Jack in front of you so that you don’t make any cutting mistakes. Tip – lightly score, but enough to go through the tape layers – and then place a metal ruler against the scored edge and the pull the tape against the ruler, diagonally to remove.
I actually had started removing some tape here
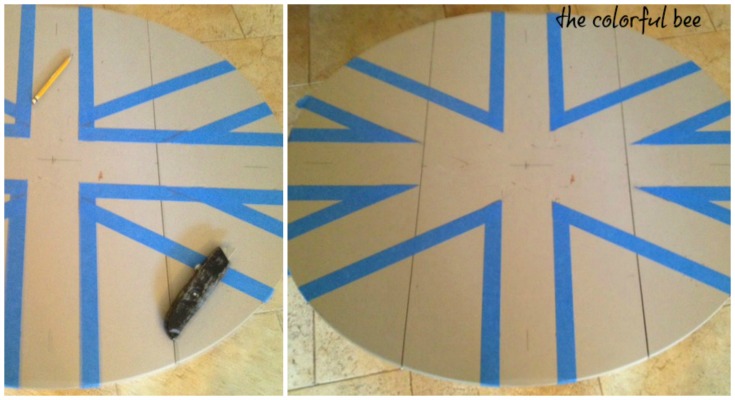
- Removing tape to make the white crosses
4) Paint the Xs in Old White (or whatever color you would like to use). I did 2 layers. Remove all tape.
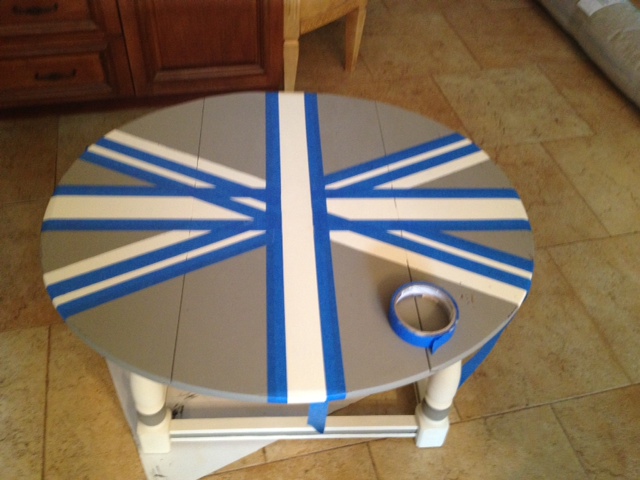
5) When dry, pencil in and tape out the rest of the design on top of the Old White where you will paint the Paris Grey or whatever you want to use! Look at your visual of the flag for where to place the stripes. Remove tape where necessary.
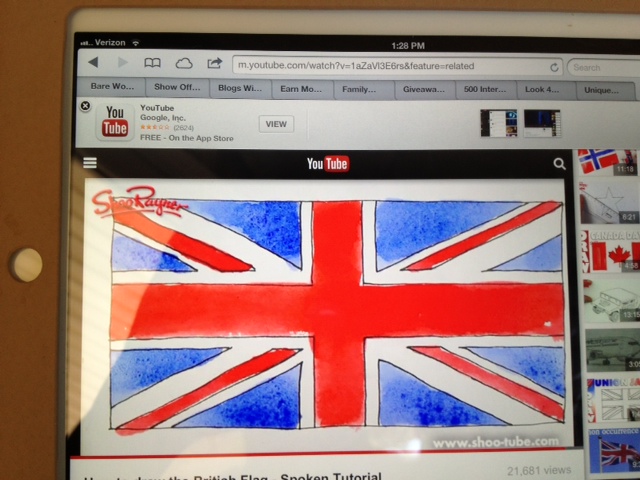
This pic from a YouTube video on how to draw the flag was very helpful
The dimensions I used: Interior crosses (where I painted Paris Grey) were approximately 2 inches wide; the smaller Old White stripes were 1/2 inches. Initially I made the small diagonal stripes 1/2 inches, but it looked too small, so I had to re-do!! I made them 3/4 inches wide and that looked so much better.
6) Paint two layers of your chosen color….remove tape. Let dry.
7) Distress, if you would like a more aged look. Wax – I first used Miss Mustard Seed’s Furniture Wax. Let dry for about 20 minutes – then buffed with a clean, lint-free cloth. Then I used MMS Antiquing Wax to age further. Let dry 20 minutes. Buff…done!
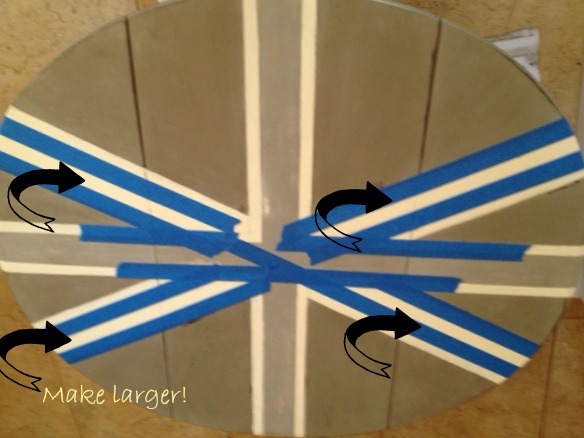
Mistakes I made: Well, I said earlier that I made the Paris Grey smaller diagonal stripes too small, so I rectified that. But, one classic mistake that I made was not looking at my Flag Visual more closely when I was doing the penciling and taping.
The was OK, but the measurement of the stripes were too thin
When I first taped the Paris Grey parts of the design, I didn’t pay attention to where I was stopping the upper right and lower left stripes. Plus, my angle was a bit off. I was hasty (as I always am) and I just taped it and painted it. So, in addition to the stripes being too narrow…there was too much white in those sections. Maybe most people wouldn’t notice it – but it bothered me so much when I took off the tape. I had to repaint and retape!

Painting the Paris Grey sections of the table
Too much Old White, narrow stripes of Paris Grey. Needed to re-do!
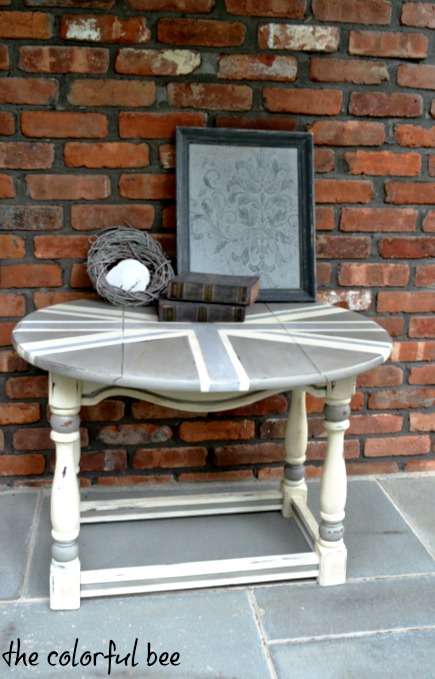
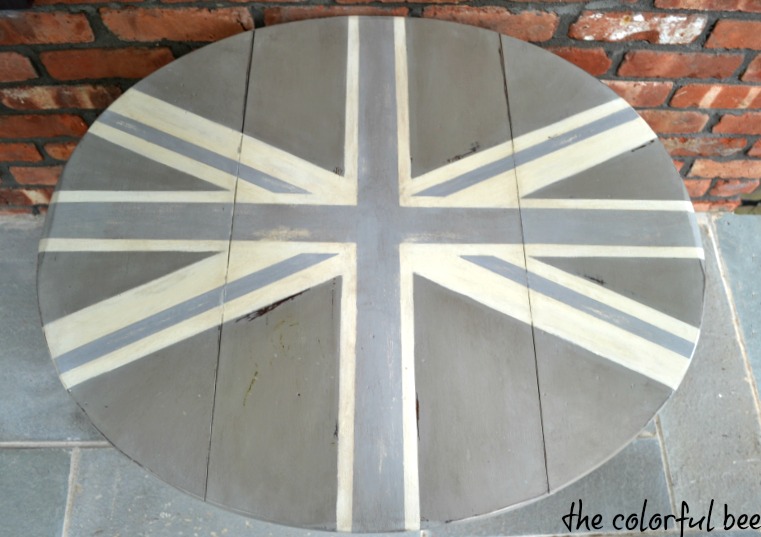
Much better…Here are some other pics.
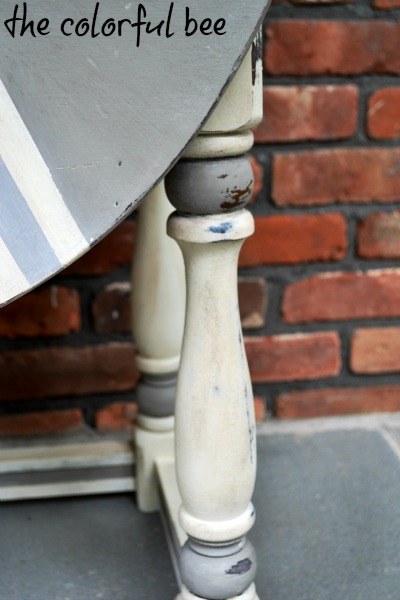
Leg close up!
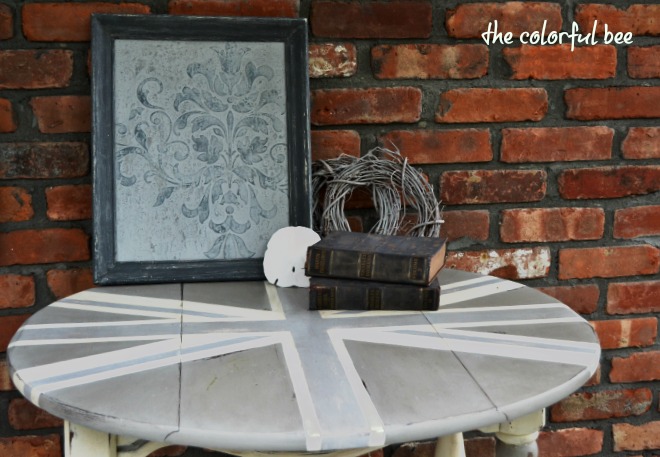
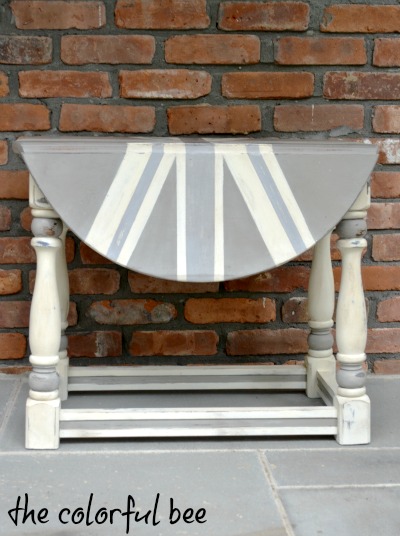
As this was a drop leaf table, when the sides are down the design still needed to make sense
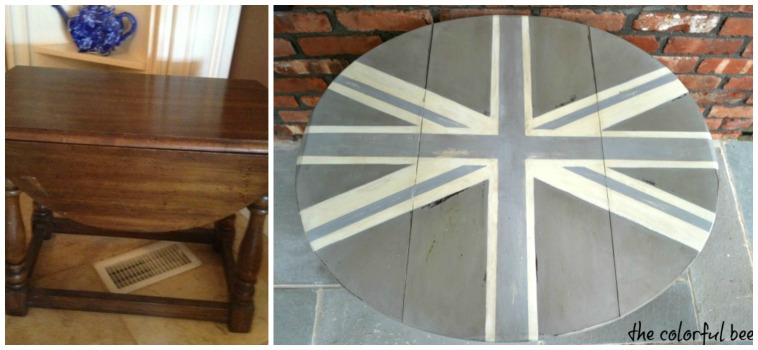
Before and After
Here are some other helpful resources…
The YouTube Video of How to Draw the Union Flag
And…Meg Made Designs tutorial on how to paint the Union Jack on a dresser.
Sharing this project with…Between Naps on the Porch; Funky Junk Interiors, DIY Showoff, Dwellings


 Decorative Finishes
 Interior Design
 Home
Home Garden
 Holiday
 Makeovers
 My Life
 Business
 Tutorials
 Videos
 Paint
Paint
Your table looks great Linda!
Donna’s party starts Friday at 9:00 pm central. I just got lucky on that one!
Thanks Jann! I will make sure that I write that info down. I am always way way down at the bottom of the link lists by the time I remember to link!
I am loving this table…great design! Come link up your post at my party Centerpiece Wednesday http://thestylesisters.blogspot.com/2013/07/centerpiece-wednesday-85-and-wrap-up.html
Karin
Wow, Linda…you’re right, this is gorgeous! I just happen to have another drop leaf table in the garage very similar to this! Now you’ve got me thinking! 🙂
Hi Christy! Thanks for writing. I can’t wait to see your drop leaf table that you have in your garage! I have some gems in mine as well…plus some in a storage unit. Have to get busy!
Hi! I was just looking for ideas to do this on my own table! I noticed on the legs it looks like graphite under the distressed bit, did you paint it first before the white and gray? I may have totally blown over that part!