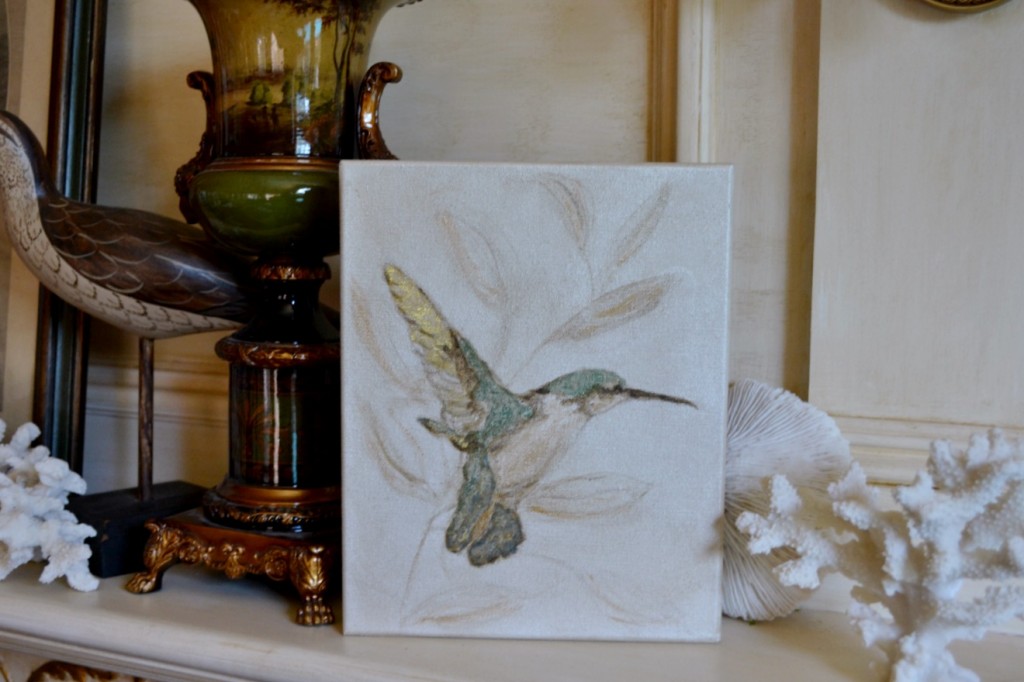
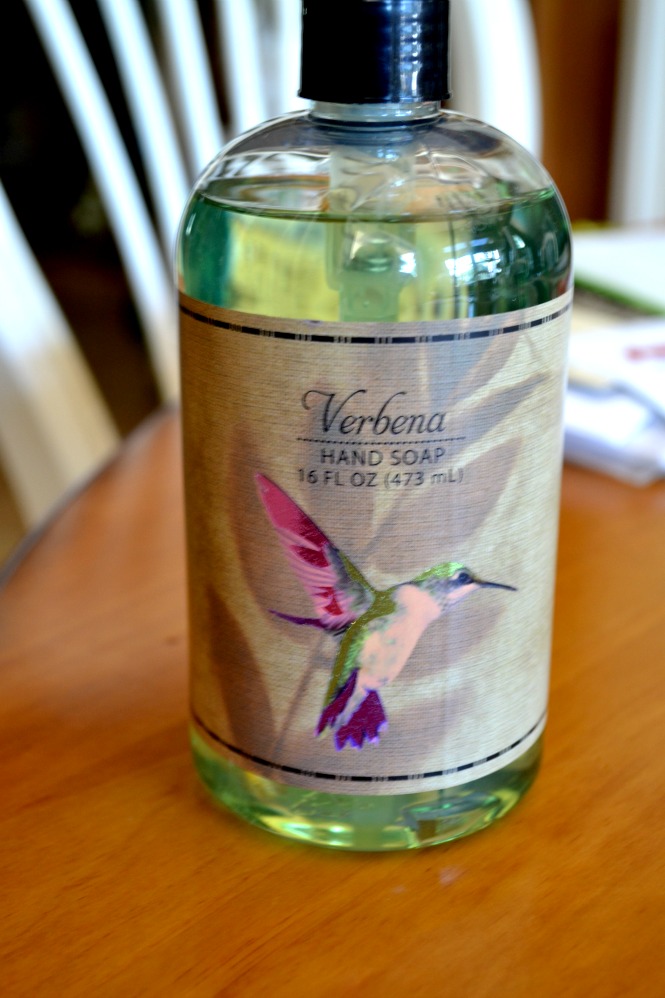
 I was in Marshall’s the other day shopping for a client in NYC. I was staging his huge apartment that needed a lot of work. I was buying some soaps and other toiletry items for his barren bathrooms (he has 4!!). I spied a very pretty plastic hand soap dispenser with a lovely hummingbird on the label. I said to myself, “This is mine – not his. Sorry!”
I immediately thought that I could use the image idea for artwork. What attracted me was the metallics used for the wings and the head. I immediately thought – metallic foils. I had purchased some for a client awhile back and I had some left over…so I figured, why not?
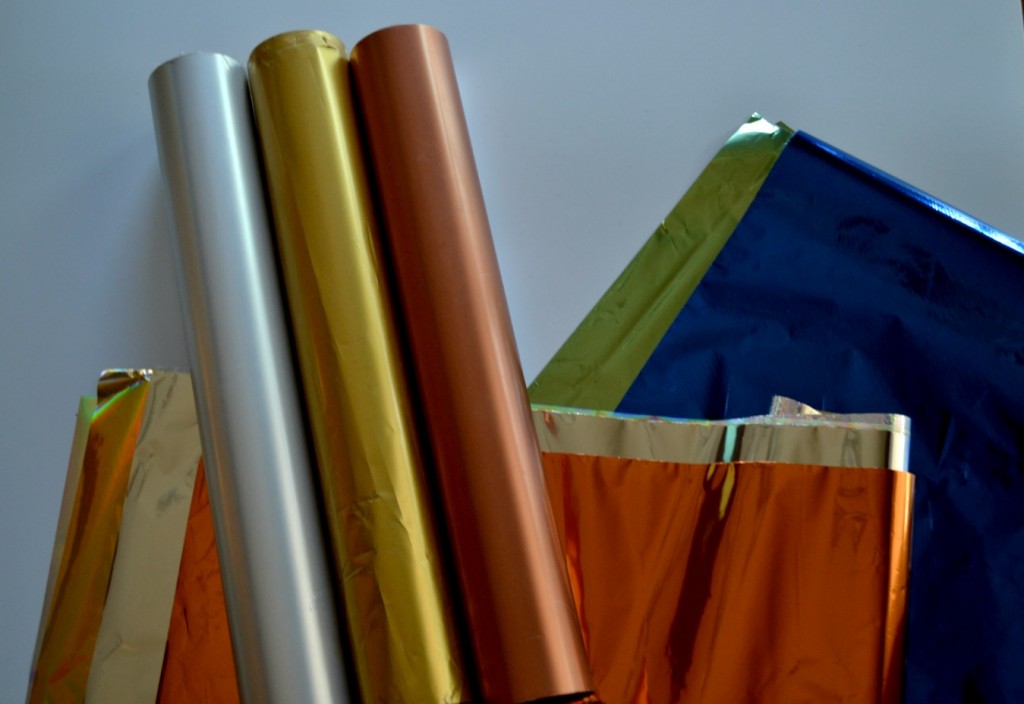
If you’re not familiar with metallic foils, they are similar to gold and silver leaf but they come in larger sized sheets and rolls – and they come in a variety of colors. You can buy a sample pack, which I would recommend, so you can get a feel for using them while you see how many colors are available. They also come in holographic foils which are great too. I’ve used them to effect glass tiles. I think Michael’s carries them now – but you can order them from Royal Design Studio or Prismatic Painting Studio.
I decided that I could do a humming bird series of small paintings (as I’ve been collecting images for this purpose). I had 3 small pre-primed canvases, so I took one and painted it in a metallic pearl.
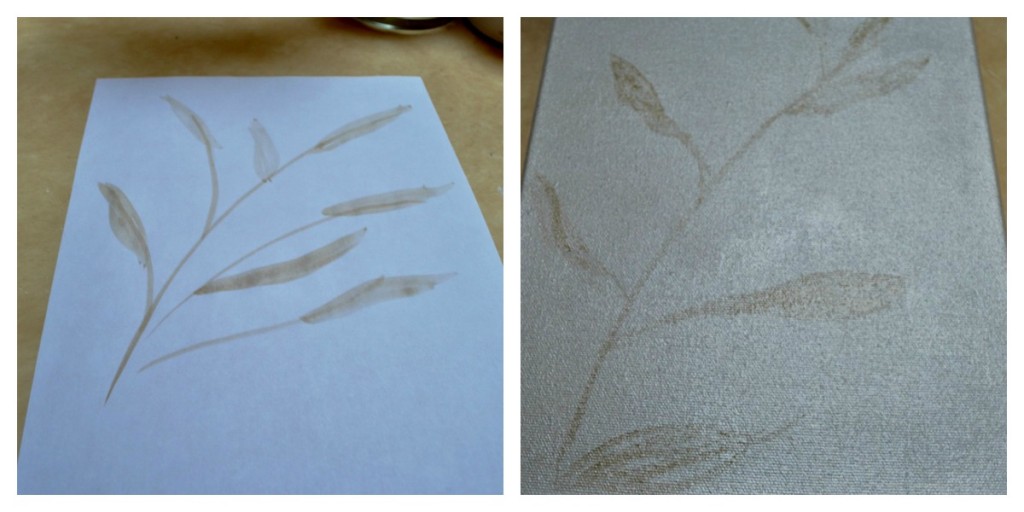
You can practice the placement of leaves first – or if you’re brave or really talented…paint them on freehand!
Then I floated in some leaves and stems in a raw umber color with a little water added. If you want to try this, you could practice this on a piece of paper first to get a feel for placement. I painted it lightly at first – knowing I could always amp up the leaves up later on.
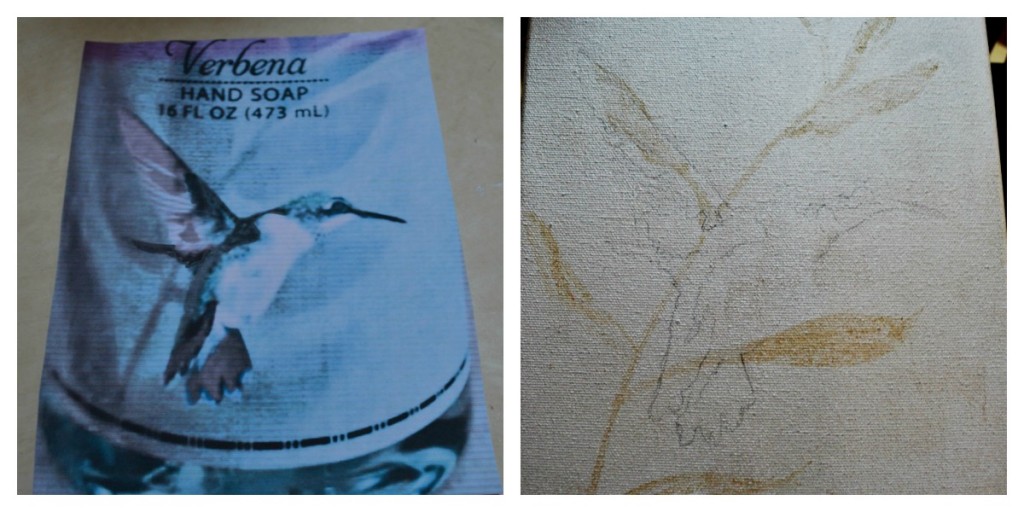
Then I enlarged, cropped and printed the photo and traced it onto the canvas using graphite paper. If you decide to do this – use any transfer method you are comfortable with.
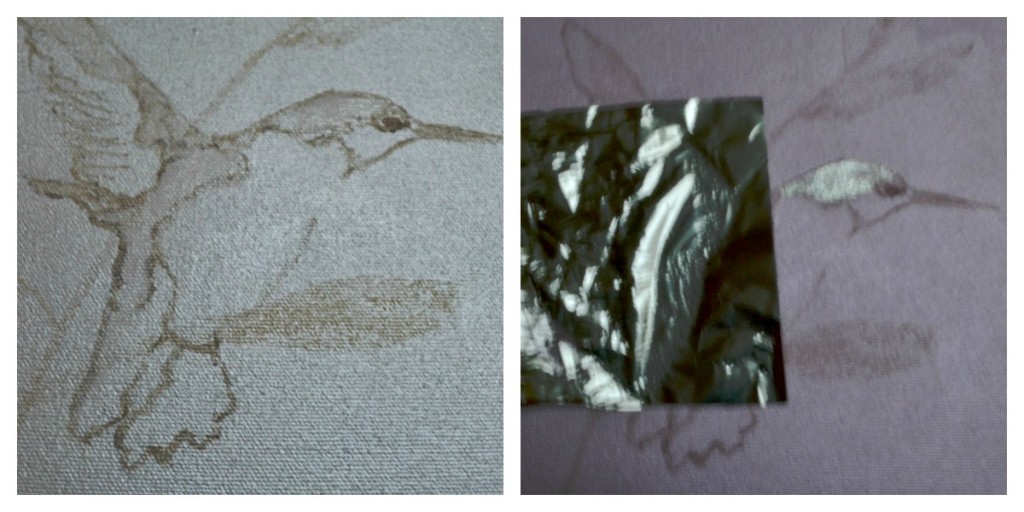
I took the same raw umber color and began to fill out and outline the body, wings etc. You can build this color up slowly. If you go too dark, just blot a bit with some cheesecloth to lighten.Then I “painted” on some adhesive size using Wundasize in the areas I wanted the metallics. (You can see it somewhat in the above left photo). I first did the green areas. I decided not to put all the size on at once because I didn’t want any green foil going into gold areas and vice versa. When the size comes to “tack” you can start putting the foil on. On these small areas I was able to start foiling after about 15 minutes or so. I used the “knuckle test,” which means I placed my knuckle gently into the area and if it made a slight pop sound, it was ready.
I cut smaller pieces of the foil and placed it Shiny Side Up (very important). I used a medium sized stencil brush to transfer the foil to the canvas. I used a fairly hard, swirling motion because I wanted to transfer it fully.
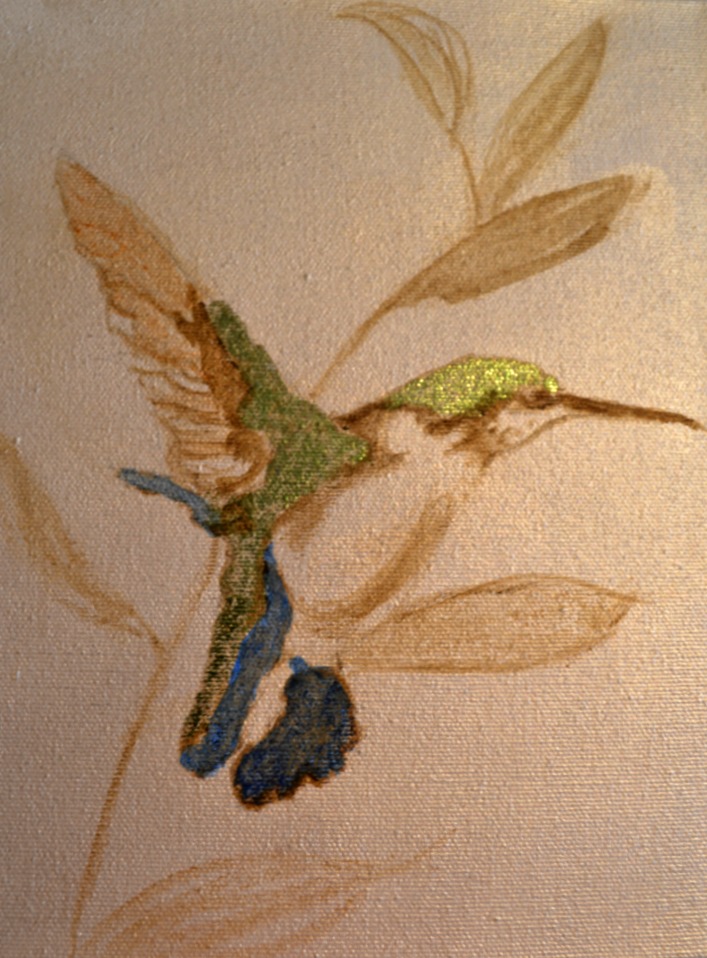
You can learn from my mistake. The blue metallic foil didn’t transfer, so I painted it blue first. Didn’t like that either! Too dark.
I didn’t have pink or purple foil, as in the image, so I decided on blue and gold. The gold went on beautifully – but something was wrong with the blue. It didn’t transfer much at all. In fact, when I rubbed hard it transferred a brown, muddy color. Yuck. I tried repainting it with blue and then sizing and transferring again – but no luck. So, I had to abandon the blue idea.
I have to say that I felt that this mess up ruined my day – and it made my painting not as good as I thought it would be. But – I carried on and decided that I learned something important. Test your foil if it’s old!! Perhaps that was the problem.
Anyway, I had a little tack left on those areas, so I sprinkled some gold mica powder on it to save it somewhat. I learned that you need to have a clean surface in order for the foil transfer to work. When I transferred the blue – the backing of the metallic foil transferred instead – and I think it made the canvas a bit dirty. So – lesson learned.
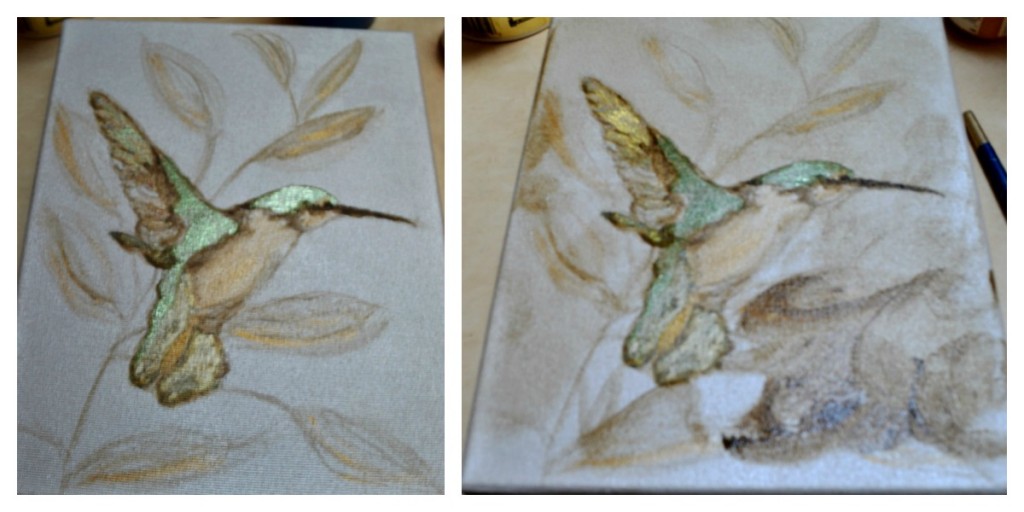
Gold mica powder softened the blue problem and glazing over the entire piece melded everything together
After the foils were on I added some more shading and I added some gold to the belly of the humming bird. I also added some more leaves to the canvas and I added some gold to the leaves as well.
For the final touch, I made up a glaze of Raw Umber, Van Dyke Brown and a touch of Gold to go over the whole canvas. (In the photo, above right, you can see that I softened the glaze at the top and not yet on the bottom – to show you how dark the glaze was when I started). You don’t have to do this but I wanted to “push back” the bird and leaves and I wanted to soften the whole look of the painting.
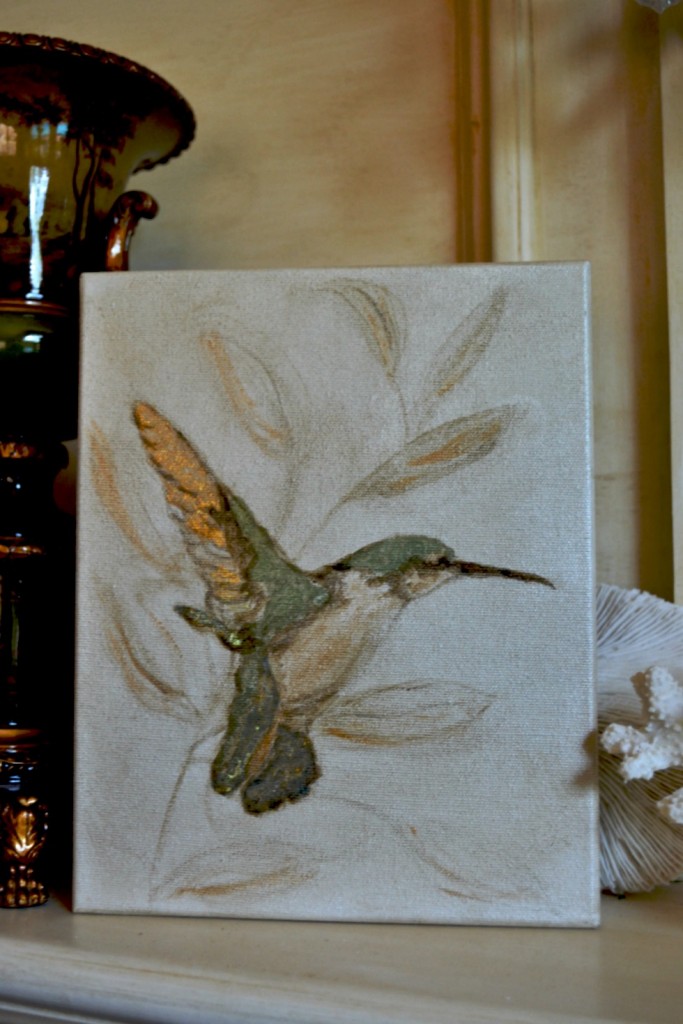 I may outline the edges of the canvas with some gimp – and I may add some upholstery tacks on the edges as well.
Hope you enjoyed this. Have you ever used metallic foils? Let me know. I’d love to hear how you are using them. Stay tuned this week because I am going to show some ideas for wall finishes and moldings using metallic foils. Thanks for coming by!!
Sharing this with these friends…
Between Naps on the Porch; DIY Showoff, Jennifer Rizzo; Market Yourself Monday, The Creative Spark Link Party; Savvy Southern Style; Our Delightful Home, Blackberryvine; Artsy Corner





 Decorative Finishes
 Interior Design
 Home
Home Garden
 Holiday
 Makeovers
 My Life
 Business
 Tutorials
 Videos
 Paint
Paint
Very, very cool, very, very beautiful……awesome work! Thanks for the great information.
Thanks for commenting Jan! I’ll be posting more info about using metallic foils and gold leaf later today.
This is beautiful! You are so talented!!
Thanks so much for sharing at Artsy Corner! Hope to see you again this week.
Lindsay @Artsy-Fartsy Mama recently posted..Artsy Corner Link Party #4
I am looking forward to seeing some of your ideas using metal foils. I haven’t used them yet.
I love the humming bird you did.
Hi Anne…
Thanks for commenting. I will be posting more about foils. I really love them. They are less finicky than gold leaf (non tarnishing) and you can put plasters and other decorative products over then without worry. Plus, the colors are fantastic! You should try them out!
Linda
Hi Linda,
I have a collection of 18th century gold ornate mirrors and a couple of ‘pier’mirrors’ that need to be re-guilded and I think I will try the foils on them.
I will keep watching your site which I am glad I found.
many thanks
Anne
Thanks Anne. Re your pier mirrors and 18th century mirrors – check to see how valuable they are. You may be ruining a valuable antiques with the foils. Have them checked first. Just in case!!!
If they are valuable, have them restored by a professional gilder. You may be sitting on a lot of money.
So, check first before you do anything!!