
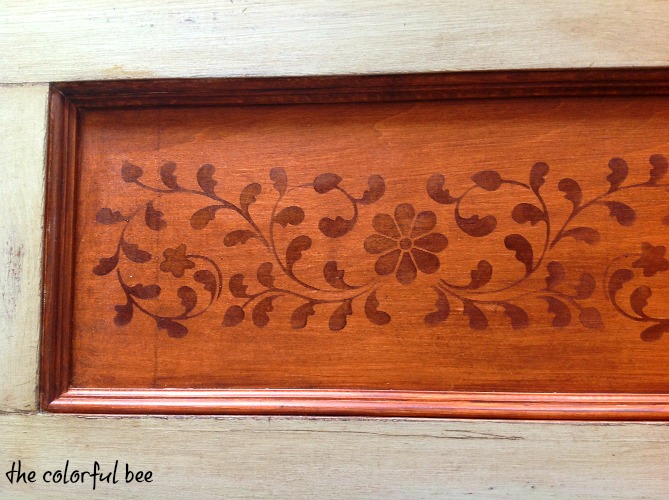
Just a quick post today to give you a peek of a project I have just finished. I will post more pics as soon as this lovely wooden valance is installed in my client’s kitchen! I will have a full tutorial on this very soon – so make sure you are signed up via email to receive my updates. Here’s a closeup…the stencil makes the wood look inlaid.
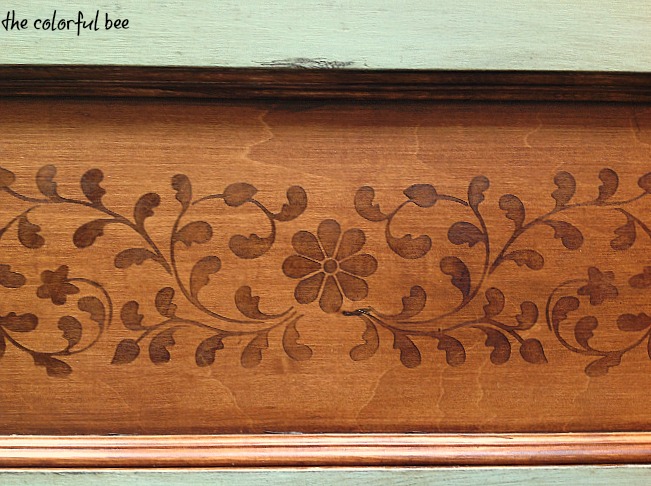
It started out as bare maple panels – and I stained and stenciled the inner panels and I primed, painted, distressed and antiqued the outer portions.

The valance is on the floor right now in these pics, taken with my iPad. (In the last pic you can see my stencil proofs that I used to determine how many runs of the stencil I would need to fit the panels). I later added some antiqued gold for the rims of the panels…not shown here. So, stay tuned for the tutorial and installed pics!
I will also be showing you the beautiful painted and antiqued island that I designed for this client – almost finished with that as well!


 Decorative Finishes
 Interior Design
 Home
Home Garden
 Holiday
 Makeovers
 My Life
 Business
 Tutorials
 Videos
 Paint
Paint
I love it when folks come together and share thoughts. Great site, continue the good work!|
…very nice …im taking an old guitar and “making it mine” …wanted to stain images all over it (much like what you have done here) …now ,are your images “stained” on? …with a stencil? …i was going to try using painters tape ,cut out my images ,then stain …however im worried about bleeding under the tape …how excatly did you create the awesomeness?
Hi Eric – what a great idea! I have to try that (I am a guitarist too!). I used a stencil from a company called Cutting Edge. It’s very easy. You just have to use stencil adhesive on the back (get this at Michael’s) and use a stencil brush (I used a pretty small one for this project). Off load the color – meaning when you put the paint on your stencil brush, don’t put it on wet…make sure you have a paper towel handy and rub off the paint from your brush so you have a fairly dry paint on your brush. Then stencil – go slowly and check every now and again to see if any seeped underneath! Perhaps for your project I would go to Modello Designs (http://www.modellodesigns.com) and get a custom sized one time use stencil. (see my dining room ceiling project on my blog!) This way you could cover your entire guitar body with a design! With this product you would not have any seepage issues at all. Great idea – take pics and send them to me. Would love to put your project on the blog!
…wonderful ,thank you for the response …today has been a crash course in ,wood 101 …the guitar is made up if three different woods and although this is all about its eccentric transformation ,the sonic quality is of most important’s …the top wood is a spruce very porous and im having to treat its differently …as i plan to record with it …ok ,so this is paint not stain …wow ,the dry method really leaves it faded and transparent …very aged ,refined distinguished if you will …the perfect characteristics for a wooden instrument of beautiful melody …ill keep you posted …and would love to see your hand at work on one as well!